
ブート可能なUSBを使用して、ThinkPad E585にUbuntu 18.04.6 LTSをインストールしました。このインストール方法は「Installing Ubuntu 18.04.x LTS (Bionic Beaver) on the Lenovo ThinkPad E585」を参照しています。
ThinkPad E585のBIOSの更新
次の手順で、USBからのブートするように設定します(画像は他のパソコンのBIOS画面です)。
- 電源ボタンを押して「F1」 キーを5~10 回連打するか、またはシステムを再起動して Lenovo ロゴが表示されると「 F1」を押します。「enter setup」と表示されます。
- 「Security」タブから「Secure Boot」を選択し、「Enabled」を「Disabled」に変更します。
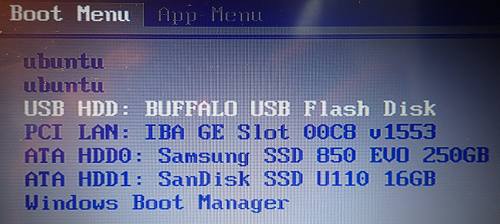
- 「Boot 」タブから「USB HDD」を選択し、最上位に位置を変更します。
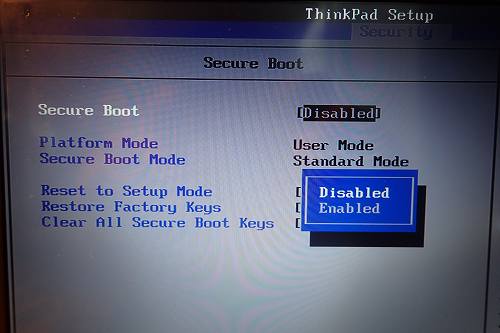
「Secure Boot」を「Disabled」に変更しないと「Secure Boot Violation」エラーメッセージが表示されます。
Ubuntu 18.04.6 LTSの取得
Ubuntu 18.04.6 LTSは、「Ubuntu 18.04.6 LTS (Bionic Beaver)」からダウンロードします。
Ubuntu 18.04.6 LTSをUSBへ書き込み
書き込みツールには「Universal-USB-Installer」を使用します。
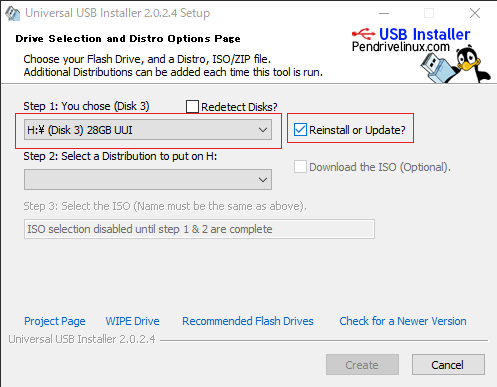
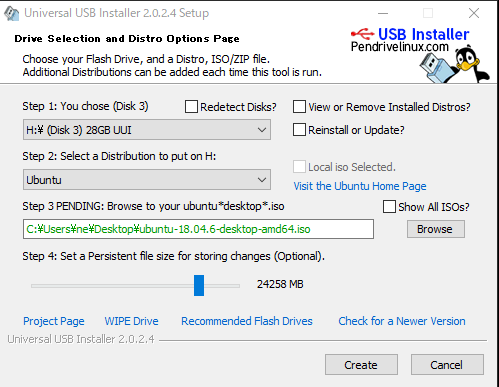
- 書き込むUSBをパソコンに挿入し、Universal-USB-Installerを起動します。
- Step1でISOファイルを書き込むUSBを選択し、「Reinstall or Update」をチェックします。USBメモリにUbuntuを書き込むためのbootがインストールされます。
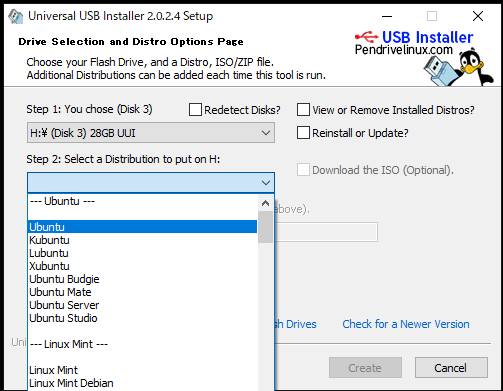
- Step2で「Ubuntu」を選択します。
- Step3で「Browse」ボタンを押して、USBに書き込むISOファイルを選択し、Step4で使用するUSBのサイズ「24258」MBを設定します。以前は4GBが限度でしたが、USBメモリの容量によって最大値が変わります。OSの容量も必要なので、USBメモリの全容量を保存領域に設定することは出来ません。各自の用途に合わせて設定します
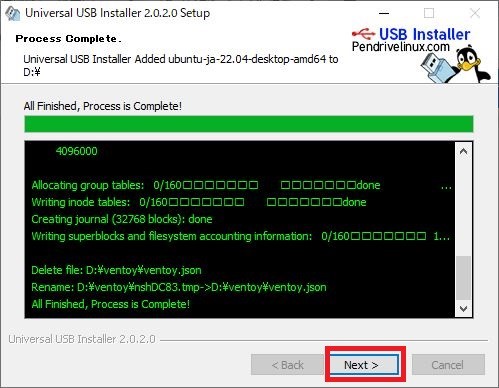
- 「Create」ボタンを押します。作成に20分程度かかります。
Ubuntuのインストール
- BIOSの設定が完了すると、作成したUSBをThinkPad E585に挿入して起動します。
- 以下の項目が表示されるので、[DIR [Linux-ISOs]] を選択します。
- 以下の項目が表示されるので、[4.69GB Ubuntu 18.04.6 LTS-desktop-amd64.iso] を選択します。
- 以下の項目が表示されるので、[Boot in normal mode] を選択します。
- 以下の項目が表示されるので、[Boot with /UUI/Linux-ISOs/Ubuntu 18.04.6 LTS-desktop-amd64.rw] を選択します。
- [Boot with /UUI/Linux-ISOs/Ubuntu 18.04.6 LTS-desktop-amd64.rw] を選択後、標準のブートローダー「GRUB」により以下の項目が表示されます。
- 項目「Installing Ubuntu」をハイライトにして、キー「e」を押してエデイトモードに移行します。項目「Try or Install Ubuntu」を選択するとUbuntuのlive環境での動作となります。
- 次のように、テキスト「 ivrs_ioapic[32]=00:14.0 ivrs_ioapic[33]=00:00.1 clocksource=hpet libata.force=1:nohrst iommu=pt」を追加します。
- キー操作「CTRL+x」で、installを再開します。以降、ThinkPad E585へのUbuntu のインストール作業が行われます。
DIR [Linux-ISOs]
/UUI/Linux-ISOs/..
4.69GB Ubuntu 18.04.6 LTS-desktop-amd64.iso
Boot in normal mode
Boot in grud2 mode
File checksum
Return to previous menu
Boot without persistence
Boot with /UUI/Linux-ISOs/Ubuntu 18.04.6 LTS-desktop-amd64.rw
Try or Install Ubuntu
Installing Ubuntu
OEM install(for manufacturers)
Boot from next volume
UEFI Firmware Settings
setparams 'Try Ubuntu without Installing'

        set gfxpayload-keep
        linux         /casper/vmlinuz file/cdrom/preseed/ubuntu.seed boot=casper quiet splash -- ivrs_ioapic[32]=00:14.0 ivrs_ioapic[33]=00:00.1 clocksource=hpet libata.force=1:nohrst iommu=pt
        initrd        /casper/initrd
補足
追加したテキスト「ivrs_ioapic[32]=00:14.0 ivrs_ioapic[33]=00:00.1 clocksource=hpet libata.force=1:nohrst iommu=pt」の説明
This is really a firmware bug, the ACPI IVRS table lacks at least one entry. Adding ivrs_ioapic[32]=00:14.0 instead of intremap=off is sufficient to make the system boot until Lenovo releases an UEFI update with a working IVRS table. At least UEFI 1.27 (2018-07-24) needs this override. And spec_store_bypass_disable=prctl is still needed for Ubuntu & co.