PicoHID Quick Start
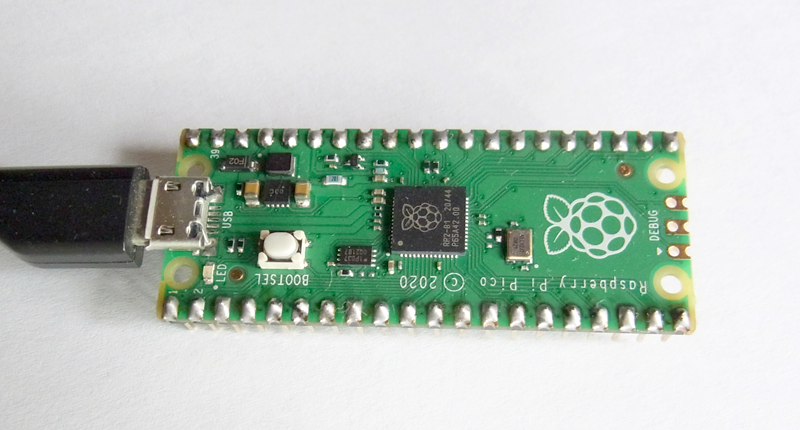
A Unity 3D object ‘cube’ in the Demo scene tilts using the generated data of the Raspberry Pi Pico. The Raspberry Pi Pico generates 3D Object position data ‘x, y, z’ using the Trigonometric function. The Raspberry Pi Pico sends that data from the Raspberry Pi Pico to Unity through Windows PC using the USB HID (Human Interface Device) interface.
When clicking a Unity 3D object ‘Button’ in the Demo scene, Unity sends the numerical data obtained from the Unity 3D object ‘Inputfield’ to the Raspberry Pi Pico. Unity works at Windows PC and sends the numerical data to the Raspberry Pi Pico using the USB HID (Human Interface Device) interface.
The following shows the capture screen when the Demo scene runs.
This Quick Start explains how to display the Demo scene on Unity using PicoHID. This Quick Start also includes some steps for downloading and setting up a package in Unity Project, and writing the Raspberry Pi Pico code.
Step-1 Download and set up a package in Unity Project
Step-2 Write Raspberry Pi Pico code using Arduino IDE
Step-3 Run Demo scene
Step-1 Download and set up a package in Unity Project
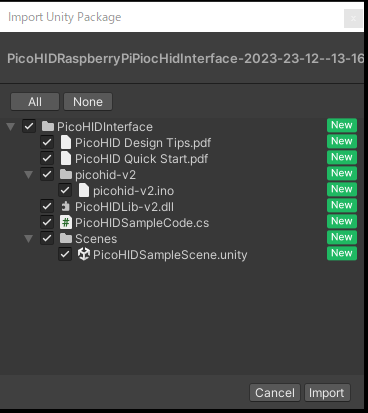
- Download PicoHID from the Asset Store, and click on the Import button.
- The package is imported under the Assets folder in your Unity project.
- Download the external plugin ’PicoHIDConnect-v2’ below and set it into the ‘Assets/PicoHIDInterface’ folder.
- external plugin ’PicoHIDConnect-v2’
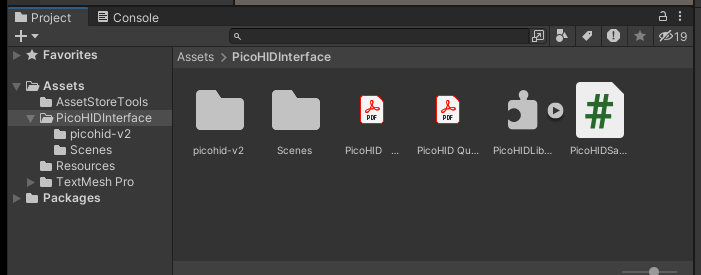
- Click the Project tab, choose ‘Assets’ > ‘PicoHIDInterface’ > ‘Scenes’ folder of the left side menu, double click on the Demo scene ‘PicoHIDSampleScene’ in the Project window.
- Connect the Raspberry Pi Pico by Micro USB cable to Windows PC, then build a software development environment for PicoHID with the Arduino IDE according to Arduino IDE for PicoHID.
- Compile and write Raspberry Pi Pico code ‘picohid-v2.ino’ of the folder ‘/Assets / PicoHIDInterface/picohid-v2’ into the Raspberry Pi Pico using the Arduino IDE.
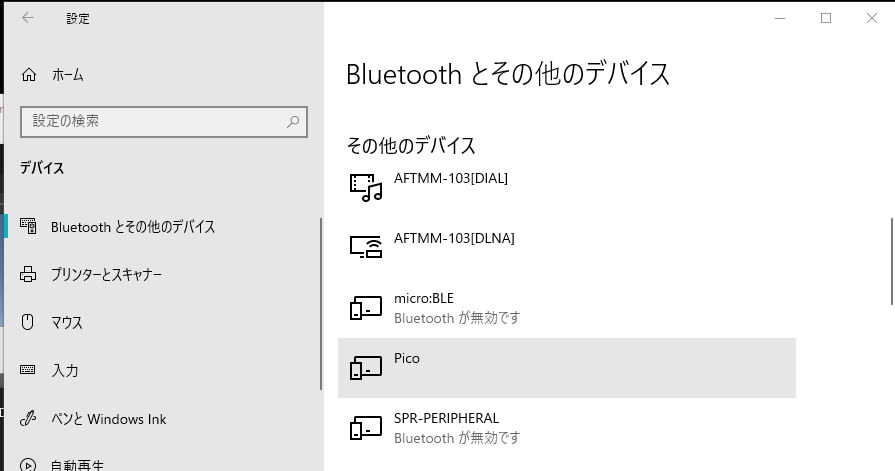
- In Windows PC, go to ‘Start’, choose ‘Settings’ > ‘Devices’ > ‘Bluetooth and other devices settings’. Click ‘Add Bluetooth or other device’ to start searching for the device.
- Like below, select the Bluetooth device ‘Pico’ you want to add from the list.
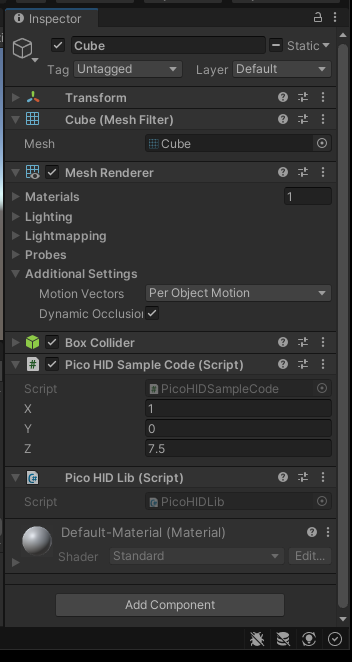
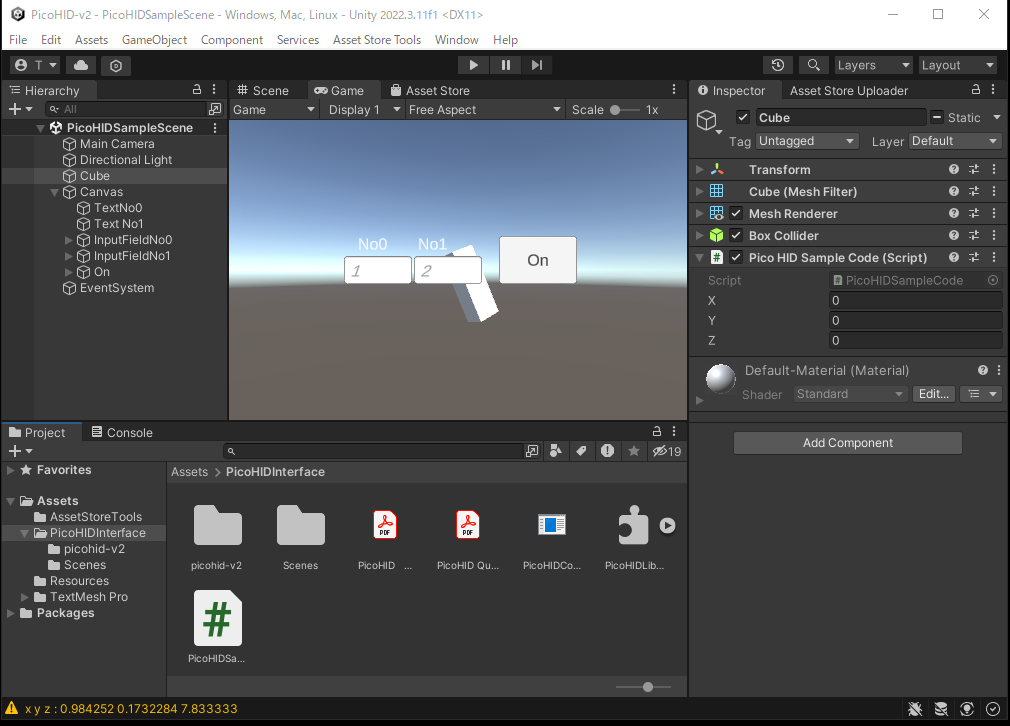
- Click the ‘Play’ button on Unity. The Unity 3D object ‘cube’ tilts in sync with the received data from the Raspberry Pi Pico. The ‘x, y, z’ in the ‘PicoHIDSampleCode’ of the ‘Inspector’ tab displays the received data ‘x, y, z’ from the Raspberry Pi Pico as follows.
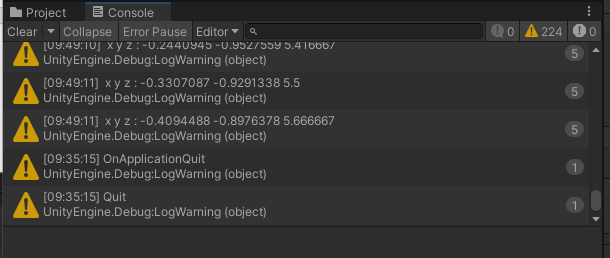
- The ’console’ tab displays the game status as follows.
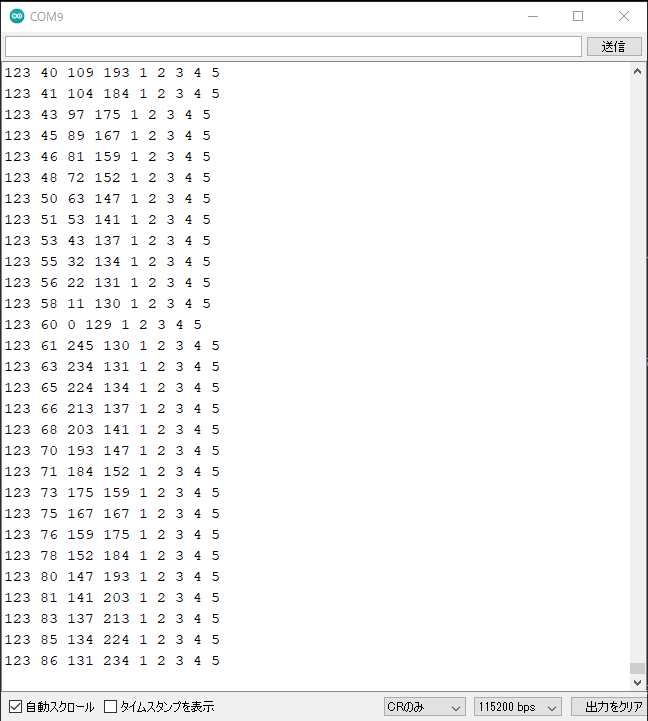
- The ‘Serial Monitor’ of Arduino IDE displays the data “x, y, z” as follows.
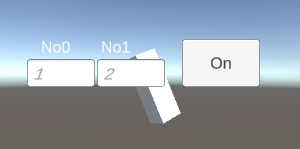
- Set No0 / No1 into Inputfield ’No0’ / Inputfield ‘No1’ in the game screen, then click the Button ‘On’ to send to the Raspberry Pi Pico. Show Inputfield ’No0’ / Inputfield ‘No1’ as follows.
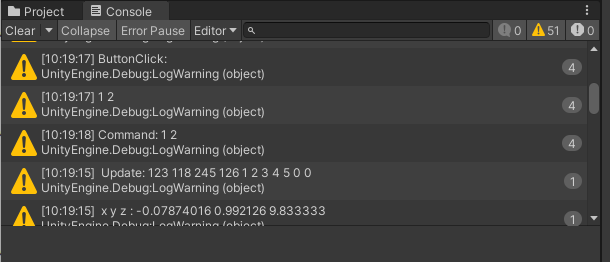
- The ’console’ tab displays the game status at clicking Button ‘On’ as follows.
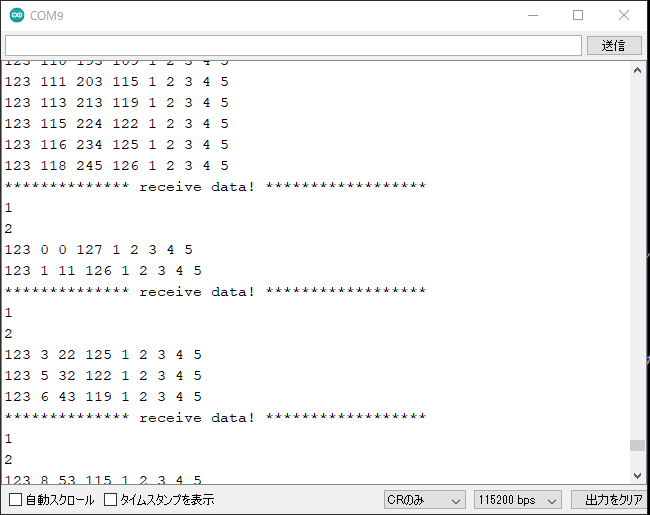
- The ‘Serial Monitor’ in Arduino IDE displays the No0/No1 data as follows.
Step-2 Write Raspberry Pi Pico code using Arduino IDE
Step-3 Run Demo scene