

Out-of-the-box plugins to boost your workflow!
TomoSoft is a software developer in the Unity Asset Store who creates input tools, interacting with Raspberry Pi, ESP32, and Micro: Bit using Bluetooth low energy(BLE) or human interface device (HiD). The created input tools take your gameplay features to the next level, in addition, to speed up your game development. Besides, they always come with clear and detailed documentation.
The following assets are explained by the site “Unity Assets Site“.
- MicroBle by MakeCode – micro BLE Interface
- MicroBleMobile by MakeCode – Micro BLE Interface
- PicoBle for PC – Pico W BLE Interface
- PicoBleMobile for Mobile – PicoW BLE Interface
- EspWiFi – Esp32 MQTT Interface
- WiFi for Pico – Raspberry Pi Pico W MQTT Interface
- WiFi for Pi – Raspberry Pi MQTT Interface
Unity Assets
TomoSoft sells the following assets in the Unity Asset Store. Those assets use to interface by BLE or Hid, between windows PC and raspberry pi, ESP32, Micro:bit. Those functions enable to send sensor data into Unity worked on windows PC, when sensors device, e.g., gyro, accelerometer, GPS, are connected with Raspberry Pi, ESP32, Micro:bit.
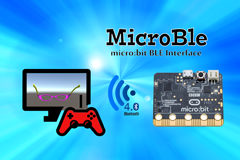
MicroBle is an interface adapter between Windows PC and micro:bit using BLE(Bluetooth low energy). This adapter can quickly add the micro:bit to your game as a gamepad ― no code required!
To use an accelerometer and LED screen on the micro:bit, you write code in purchased assets into the micro:bit, and create Unity scripts by referencing sample code in purchased assets. Thereby you can use the x, y, and z acceleration data of the accelerometer and LED screen data in your game.
Features:
- The package includes the micro:bit code that obtains x, y, and z acceleration data from the micro:bit. You write this code to the micro:bit using Arduino IDE.
- Read accelerometer data from the micro:bit, convert x, y, z acceleration data to byte array data type, and transfer that data to Unity by using BLE(Bluetooth low energy).
- The package also includes the micro:bit code that receives LED screen ON/OFF data at the micro:bit. You write this code to the micro:bit using Arduino IDE.
- The package includes the Unity 3D object ‘glasses’ for displaying the accelerometer and Inputfield / Button for displaying the LED screen on the micro:bit.
- The Unity script example describes how to receive the acceleration data from micro:bit and to send the LED screen data to the micro:bit.
- Refer to ‘MicroBle Quick Start’ for how to set up the MicroBle In detail.
- Refer to ‘MicroBle Design Tips’ to rewrite the micro:bit code and the Unity script example. You can transfer array data up to 64 bytes between Windows PC and micro:bit to connect your sensor or display panel to the micro:bit.
Requirements:
- Unity 2022.3 or newer
- Windows PC (Windows10) with Bluetooth low Energy Adapter
- BBC micro:bit Version 1.x ( not work 2.x)
- Arduino IDE, for details, refer to ‘Arduino IDE for MicroBle’ for how to set up the development environment.
- Transfer array data up to 64 bytes from Unity to micro:bit and array data up to 64 bytes from micro:bit to Unity by changing the Unity script example and the micro:bit code.
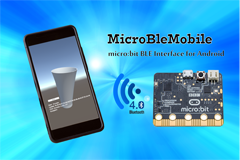
MicroBleMobile is an interface adapter between Android mobile phone and micro:bit using BLE (Bluetooth low energy). This adapter can quickly add the micro:bit to your game as a gamepad ― no code required! To use the sensors device (gyro, accelerometer, GPS, etc.) and the display panel (LED, LCD panel, etc.) on the micro:bit, you write code in purchased assets into the micro:bit and create Unity scripts by referencing sample code in purchased assets. Thereby you can use the sensor device data and the display panel data in your game.
Features:
-
- The package includes the micro:bit code that obtains x, y, and z data generated by the SIN function from the micro:bit. You write this code to the micro:bit using Arduino IDE.
- Read x, y, and z data from the micro:bit, convert x, y, and z data to byte array data type, and transfer that data to Unity by using BLE (Bluetooth low energy).
- The package also includes the micro:bit code that receives numerical data at the micro:bit. You write this code to the micro:bit using Arduino IDE.
- The package include
s the Unity 3D object ‘tumbler’ for displaying the x, y, and z and Inputfield / Button for sending numerical to the micro:bit.
- The Unity script example describes how to receive the x, y, and z data from micro:bit and to send the numerical data to micro:bit.
- Refer to ‘MicroBleMobile Quick Start’ for how to set up the MicroBleMobile in detail.
- Refer to ‘MicroBleMobile Design Tips’ to rewrite the micro:bit code and the Unity script example. You can transfer array data up to 64 bytes between Android mobile phone and micro:bit to connect your sensor or display panel to the micro:bit.
Requirements:
- Unity 2022.3 or newer
- Android mobile phone (Android 7.0 Nougat or higher)
- BBC micro:bit Version 1.x ( not work 2.x)
- Building games for Android, for details, refer to ‘Building games for Android’ for how to build and run game objects for Android.
- Android Logcat, for details, refer to ‘Install and Use Android Logcat’ for how to install and use Android Logcat.
- Arduino IDE, for details, refer to ‘Arduino IDE for MicroBle’ for how to set up the development environment.
- Transfer array data up to 64 bytes from Unity to micro:bit and array data up to 64 bytes from micro:bit to Unity by changing the Unity script example and the micro:bit code.
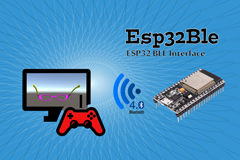
Esp32Ble is a powerful interface bridge that connects your Windows PC to an ESP32 via Bluetooth Low Energy (BLE). This asset allows you to integrate an ESP32 into your project as a plug-and-play gamepad—no coding required for basic setup!
For advanced users, it provides a seamless workflow to stream sensor data (Gyroscope, Accelerometer, GPS, etc.) and control external displays (LED, LCD panels) directly from Unity. By using the included ESP32 firmware and Unity sample scripts, you can bridge the gap between physical hardware and your digital world.
Key Features
- Plug-and-Play Gamepad: Quickly add ESP32 as a controller to your game.
- Bidirectional Data Transfer: Easily send and receive byte arrays between Unity and ESP32 via BLE.
- Ready-to-Use ESP32 Firmware: Includes pre-written Arduino code (e.g., a SIN function data generator) to get you started instantly.
- Comprehensive Unity Samples: Includes a 3D “Glasses” model to visualize XYZ data and a UI (InputField/Buttons) for sending data to the ESP32.
- Flexible Integration: Customize the provided Unity scripts and ESP32 code to connect any sensor or display panel.
Included Documentation
- Quick Start v2.1: A step-by-step guide for the initial setup of Esp32Ble.
- Design Tips v2.1: Advanced guide for customizing ESP32 code and Unity scripts to handle specific array data for your custom hardware.
- Arduino IDE v2 for Esp32: Detailed instructions on setting up the Arduino development environment for ESP32.
Technical Requirements
- Unity Version: Unity 6 (6000.3.2f1) or newer.
- Platform: Windows 11 PC with a Bluetooth Low Energy (BLE) adapter.
- Hardware: ESP32 or ESP32-S3.
- Development Tools: Arduino IDE (for uploading firmware to the ESP32).
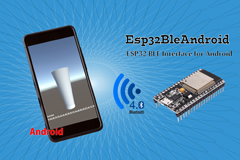
Esp32BleAndroid is a powerful interface bridge that connects your Android phone to an ESP32 via Bluetooth Low Energy (BLE). This asset allows you to integrate an ESP32 into your project as a plug-and-play gamepad—no coding required for basic setup!
For advanced users, it provides a seamless workflow to stream sensor data (Gyroscope, Accelerometer, GPS, etc.) and control external displays (LED, LCD panels) directly from Unity. By using the included ESP32 firmware and Unity sample scripts, you can bridge the gap between physical hardware and your digital world.
Key Features
- Plug-and-Play Gamepad: Quickly add ESP32 as a controller to your game.
- Bidirectional Data Transfer: Easily send and receive byte arrays between Unity and ESP32 via BLE.
- Ready-to-Use ESP32 Firmware: Includes pre-written Arduino code (e.g., a SIN function data generator) to get you started instantly.
- Comprehensive Unity Samples: Includes a 3D “tumbler” model to visualize XYZ data and a UI (InputField/Buttons) for sending data to the ESP32.
- Flexible Integration: Customize the provided Unity scripts and ESP32 code to connect any sensor or display panel.
Included Documentation
- Quick Start v2.1: A step-by-step guide for the initial setup of Esp32BleAndroid.
- Design Tips v2.1: Advanced guide for customizing ESP32 code and Unity scripts to handle specific array data for your custom hardware.
- Arduino IDE v2 for Esp32: Detailed instructions on setting up the Arduino development environment for ESP32.
- Building and Debugging Games for Android: Build games for Android and use the debug tool “Android Logcat.”
Technical Requirements
- Unity Version: Unity 6 (6000.3.2f1) or newer.
- Platform: Android phone (Android 11 or higher).
- Hardware: ESP32 or ESP32-S3.
- Development Tools: Arduino IDE (for uploading firmware to the ESP32).

PiBle is an interface adapter between Windows PC and Raspberry Pi using BLE (Bluetooth low energy). This adapter can quickly add the Raspberry Pi to your game as a gamepad ― no code required! To use the sensors device (gyro, accelerometer, GPS, etc.) and the display panel (LED, LCD panel, etc.) on the Raspberry Pi, you write code in purchased assets into the Raspberry Pi and create Unity scripts by referencing sample code in purchased assets. Thereby you can use the sensor device data and the display panel data in your game.
Features:
- The package includes the Raspberry Pi code (Python script) that obtains x, y, and z data generated by the SIN function from the Raspberry Pi. You copy (use FTP) this code to the Raspberry Pi.
- Read x, y, and z data from the Raspberry Pi, convert x, y, and z data to byte array data type, and transfer that data to Unity by using BLE (Bluetooth low energy).
- The package also includes the Raspberry Pi code that receives numerical data at the Raspberry Pi. You copy this code to the Raspberry Pi.
- The package includes the Unity 3D object ‘glasses’ for displaying the x, y, and z and Inputfield / Button for sending numerical to the Raspberry Pi.
- The Unity script example describes how to receive the x, y, and z data from Raspberry Pi and to send the numerical data to Raspberry Pi.
- Refer to ‘PiBle Quick Start’ for how to set up the PiBle in detail.
- Refer to ‘PiBle Design Tips’ to rewrite the Raspberry Pi code and the Unity script example. You can transfer array data up to 64 bytes between Windows PC and Raspberry Pi to connect your sensor or display panel to the Raspberry Pi.
Requirements:
- Unity 2022.3 or newer
- Windows PC (Windows10) with Bluetooth low Energy Adapter
- Raspberry Pi 4(include Raspberry Pi 3 or Raspberry Pi Zero W) or higher
- Transfer array data up to 64 bytes from Unity to Raspberry Pi and array data up to 64 bytes from Raspberry Pi to Unity by changing the Unity script example and the Raspberry Pi code.
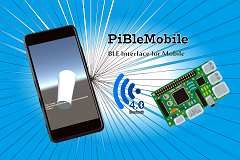
PiBleMobile is an interface adapter between Android mobile phone and Raspberry Pi using BLE (Bluetooth low energy). This adapter can quickly add the Raspberry Pi to your game as a gamepad ― no code required! To use the sensors device (gyro, accelerometer, GPS, etc.) and the display panel (LED, LCD panel, etc.) on the Raspberry Pi, you write code in purchased assets into the Raspberry Pi and create Unity scripts by referencing sample code in purchased assets. Thereby you can use the sensor device data and the display panel data in your game.
Features:
- The package includes the Raspberry Pi code (Python script) that obtains x, y, and z data generated by the SIN function from the Raspberry Pi. You copy (use FTP) this code to the Raspberry Pi.
- Read x, y, and z data from the Raspberry Pi, convert x, y, and z data to byte array data type, and transfer that data to Unity by using BLE (Bluetooth low energy).
- The package also includes the Raspberry Pi code that receives numerical data at the Raspberry Pi. You copy this code to the Raspberry Pi.
- The package includes the Unity 3D object ‘tumbler’ for displaying the x, y, and z and Inputfield / Button for sending numerical to the Raspberry Pi.
- The Unity script example describes how to receive the x, y, and z data from Raspberry Pi and to send the numerical data to Raspberry Pi.
- Refer to ‘PiBleMobile Quick Start’ for how to set up the PiBleMobile in detail.
- Refer to ‘PiBleMobile Design Tips’ to rewrite the Raspberry Pi code and the Unity script example. You can transfer array data up to 64 bytes between Android mobile phone and Raspberry Pi to connect your sensor or display panel to the Raspberry Pi.
Requirements:
- Unity 2022.3 or newer
- Android mobile phone (Android 7.0 Nougat or higher)
- Raspberry Pi 4(including Raspberry Pi 3 or Raspberry Pi Zero W) or higher. Not work at Python 3.11.x.
- Building games for Android, for details, refer to ‘Building games for Android’ for how to build and run game objects for Android.
- Android Logcat, for details, refer to ‘Install and Use Android Logcat’ for how to install and use Android Logcat.
- Transfer array data up to 64 bytes from Unity to Raspberry Pi and array data up to 64 bytes from Raspberry Pi to Unity by changing the Unity script example and the Raspberry Pi code.
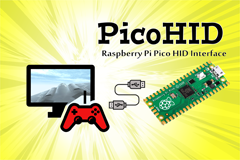
PicoHID is an interface adapter between Windows PC and Raspberry Pi Pico using USB HID (Human interface device). This adapter can quickly add the Raspberry Pi Pico to your game as a gamepad ― no code required! To use the sensors device (gyro, accelerometer, GPS, etc.) and the display panel (LED, LCD panel, etc.) on the Raspberry Pi Pico, you write code in purchased assets into the Raspberry Pi Pico and create Unity scripts by referencing sample code in purchased assets. Thereby you can use the sensor device data and the display panel data in your game.
Features:
- The package includes the Raspberry Pi Pico code that obtains x, y, and z data generated by the Trigonometric function from the Raspberry Pi Pico. You write this code to the Raspberry Pi Pico using Arduino IDE.
- Read x, y, and z data from the Raspberry Pi Pico, convert x, y, and z data to byte array data type, and transfer that data to Unity by using USB HID (Human interface device).
- The package also includes the Raspberry Pi Pico code that receives numerical data at the Raspberry Pi Pico. You write this code to the Raspberry Pi Pico using Arduino IDE.
- The package includes the Unity 3D object ‘cube’ for displaying the x, y, and z and Inputfield / Button for sending numerical to the Raspberry Pi Pico.
- The Unity script example describes how to receive the x, y, and z data from Raspberry Pi Pico and to send the numerical data to Raspberry Pi Pico.
- Refer to ‘PicoHID Quick Start’ for how to set up the PicoHID in detail.
- Refer to ‘PicoHID Design Tips’ to rewrite the Raspberry Pi Pico code and the Unity script example. You can transfer array data up to 64 bytes between Windows PC and Raspberry Pi Pico to connect your sensor or display panel to the Raspberry Pi Pico.
Requirements:
- Unity 2022.3 or newer
- Windows PC (Windows10)
- Raspberry Pi Pico
- Arduino IDE, for details, refer to ‘Arduino IDE for PicoHID’ for how to set up the development environment.
- Transfer array data up to 64 bytes from Unity to Raspberry Pi Pico and array data up to 64 bytes from Raspberry Pi Pico to Unity by changing the Unity script example and the Raspberry Pi Pico code.
In case of any trouble, contact me by email so I can assist you.