Out-of-the-box plugins to boost your workflow!
TomoSoft is a software developer in the Unity Asset Store who creates input tools, interacting with Raspberry Pi, ESP32, and Micro: Bit using Bluetooth low energy(BLE) or human interface device (HiD). The created input tools take your gameplay features to the next level, in addition, to speed up your game development. Besides, they always come with clear and detailed documentation.
The following assets are explained by the site “Unity Assets Site“.
Unity Assets
TomoSoft sells the following assets in the Unity Asset Store. Those assets use to interface by BLE or Hid, between windows PC and raspberry pi, ESP32, Micro:bit. Those functions enable to send sensor data into Unity worked on windows PC, when sensors device, e.g., gyro, accelerometer, GPS, are connected with Raspberry Pi, ESP32, Micro:bit.
- MicroBle by MakeCode – micro BLE Interface
- MicroBleMobile by MakeCode – Micro BLE Interface
- PicoBle for PC – Pico W BLE Interface
- PicoBleMobile for Mobile – PicoW BLE Interface
- EspWiFi – Esp32 MQTT Interface
- WiFi for Pico – Raspberry Pi Pico W MQTT Interface
- WiFi for Pi – Raspberry Pi MQTT Interface
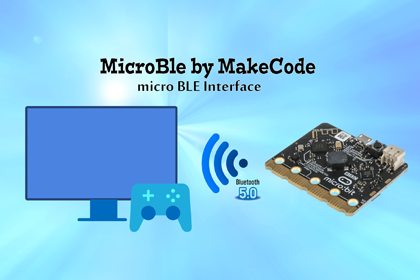
MicroBle by MakeCode – micro BLE Interface
MicroBle by MakeCode is an interface adapter that connects Windows PC to micro:bit version 2.x using BLE(Bluetooth low energy). This adapter allows for the quick integration of micro:bit as an alternative gamepad in your game—no coding required!
To utilize an accelerometer and LED screen on the micro:bit, you will write code by MakeCode for the micro:bit, and execute Unity scripts using purchased assets. This setup enables you to receive x, y, and z acceleration data from the accelerometer and send a message to the LED screen.
Features:
- The package includes the micro:bit code that obtains x, y, and z acceleration data from the accelerometer sensor. You write this code to the micro:bit using MakeCode.
- Read accelerometer data from the micro:bit and transfer that data to Unity by using BLE(Bluetooth low energy).
- The package includes the Unity 3D object ‘glasses’ to move using the accelerometer and Inputfield / Button for displaying message on the LED screen on the micro:bit.
- The Unity script describes how to receive the acceleration data from micro:bit and to send a message to the LED screen on micro:bit.
- Refer to ‘Quick Start of MicroBle by MakeCode’ for how to set up the MicroBle in detail.
Requirements:
- Unity 2022.3 or newer
- Windows PC (Windows10 or Windows11) with Bluetooth low Energy Adapter
- BBC micro:bit version 2.x
- Ability to send a message (maximum: 20 alphanumeric characters)
- MakeCode for setup instructions refer to ‘MakeCode for micro:bit’
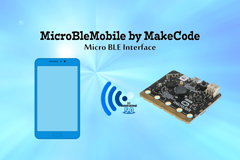
MicroBleMobile by MakeCode – Micro BLE Interface
Asset ‘MicroBleMobile by MakeCode’ is an interface adapter between Android mobile phone and micro:bit version 2.x using BLE (Bluetooth low energy). This adapter allows for the quick integration of micro:bit as an alternative gamepad in your game—no coding required!
To utilize an accelerometer and LED screen on the micro:bit, you will write code in MakeCode for the micro:bit, and execute Unity scripts using purchased assets. This setup enables you to receive x, y, and z acceleration data from the accelerometer and send a message to the LED screen.
Features:
- The package includes the micro:bit code that obtains x, y, and z acceleration data from the accelerometer sensor. You write this code to the micro:bit using MakeCode.
- Read accelerometer data from the micro:bit and transfer that data to Unity by using BLE(Bluetooth low energy).
- The package includes the Unity 3D object ‘tumbler’ to move using the accelerometer and Inputfield / Button for displaying message on the LED screen on the micro:bit.
- The Unity script describes how to receive the acceleration data from micro:bit and to send a message to the LED screen on micro:bit.
- Refer to ‘Quick Start of MicroBleMobile by MakeCode’ for how to set up this assets in detail.
Requirements:
- Unity 2022.3 or newer
- Android mobile phone (Android 7.0 Nougat or higher)
- BBC micro:bit version 2.x
- Building games for Android, for details, refer to ‘Building games for Android’ for how to build and run game objects for Android.
- Android Logcat, for details, refer to ‘Install and Use Android Logcat’ for how to install and use Android Logcat.
- Ability to send a message (maximum: 20 alphanumeric characters)
- MakeCode for setup instructions, refer to ‘MakeCode for micro:bit’
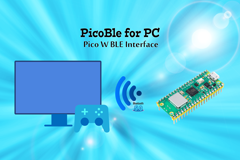
PicoBle for PC – Pico W BLE Interface
Asset ‘PicoBle for PC’ is an interface adapter between Windows PC and Pico W using BLE (Bluetooth low energy). This asset can quickly add the Pico W to your game as a gamepad ― no code required! To use the sensors device (gyro, accelerometer, GPS, etc.) and the display panel (LED, LCD panel, etc.) on the Pico W, you write code in purchased assets into the Pico W and create Unity scripts by referencing sample code in purchased assets. Thereby you can use the sensor device data and the display panel data in your game.
Features:
- The package includes the Pico W code that obtains x, y, and z data generated by the SIN function from the Pico W. You write this code to the Pico W using Arduino IDE.
- Read x, y, and z data from the Pico W, convert x, y, and z data to byte array data type, and transfer that data to Unity by using BLE (Bluetooth low energy).
- The package also includes the Pico W code that receives numerical data at the Pico W. You write this code to the Pico W using Arduino IDE.
- The package includes the Unity 3D object ‘glasses’ for displaying the x, y, and z and Inputfield / Button for sending numerical to the Pico W.
- The Unity script example describes how to receive the x, y, and z data from Pico W and to send the numerical data to Pico W.
- Refer to ‘Quick Start of PicoBle for PC’ for how to set up this asset in detail.
- Refer to ‘Design Tips of PicoBle for PC’ to rewrite the Pico W code and the Unity script example. You can transfer array data up to 64 bytes
- between Windows PC and Pico W to connect your sensor or display panel to the Pico W.
Requirements:
- Unity 2022.3 or newer
- Windows PC (Windows10 or 11) with Bluetooth low Energy Adapter
- Raspberry Pi Pico W (Rasberry Pi Pico does not work)
- Arduino IDE, for details, refer to ‘Arduino IDE v2 for Pico/Pico W’ for how to set up the development environment.
- Transfer array data up to 64 bytes from Unity to Pico W and array data up to 64 bytes from Pico W to Unity by changing the Unity script example and the Pico Wcode.
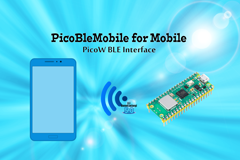
PicoBleMobile for Mobile – PicoW BLE Interface
Asset ‘PicoBleAndroid for Mobile’ is an interface adapter between Android mobile phone and Pico W using BLE (Bluetooth low energy). This asset can quickly add the Pico W to your game as a gamepad ― no code required! To use the sensors device (gyro, accelerometer, GPS, etc.) and the display panel (LED, LCD panel, etc.) on the Pico W, you write code in purchased assets into the Pico W and create Unity scripts by referencing sample code in purchased assets. Thereby you can use the sensor device data and the display panel data in your game.
Features:
- The package includes the Pico W code that obtains x, y, and z data generated by the SIN function from the Pico W. You write this code to the Pico W using Arduino IDE.
- Read x, y, and z data from the Pico W, convert x, y, and z data to byte array data type, and transfer that data to Unity by using BLE (Bluetooth low energy).
- The package also includes the Pico W code that receives numerical data at the Pico W. You write this code to the Pico W using Arduino IDE.
- The package includes the Unity 3D object ‘tumbler’ for displaying the x, y, and z and Inputfield / Button for sending numerical to the Pico W.
- The Unity script example describes how to receive the x, y, and z data from Pico W and to send the numerical data to Pico W.
- Refer to ‘Quick Start of PicoBleAndroid for Mobile’ for how to set up this asset in detail.
- Refer to ‘Design Tips of PicoBleAndroid for Mobile’ to rewrite the Pico W code and the Unity script example. You can transfer array data up to 64 bytes between Android mobile phone and Pico W to connect your sensor or display panel to the Pico W.
Requirements:
- Unity 2022.3 or newer
- Android mobile phone (Android 7.0 Nougat or higher)
- Raspberry Pi Pico W (Rasberry Pi Pico does not work)
- Building games for Android, for details, refer to ‘Building games for Android’ for how to build and run game objects for Android.
- Android Logcat, for details, refer to ‘Install and Use Android Logcat’ for how to install and use Android Logcat.
- Arduino IDE, for details, refer to ‘Arduino IDE v2 for Pico/Pico W’ for how to set up the development environment.
- Transfer array data up to 64 bytes from Unity to Pico W and array data up to 64 bytes from Pico W to Unity by changing the Unity script example and the Pico W code.
EspWiFi – Esp32 MQTT Interface
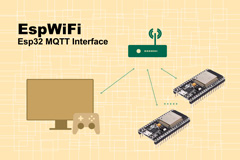
EspWiFi is an interface adapter between a single Windows PC and plural Esp32s via WiFi using MQTT communication. This adapter can quickly add plural Esp32s to your game as a gamepad ― no code required! To use the sensors device (gyro, accelerometer, GPS, etc.) and the display panel (LED, LCD panel, etc.) on the Esp32, you write code in purchased assets into the Esp32 and create Unity scripts by referencing sample code in purchased assets. Thereby you can use the sensor device data and the display panel data in your game.
Features:
- The package includes the Esp32 code that obtains x, y, and z data from the Esp32. You write this code to the Esp32 using Arduino IDE.
- Read x, y, and z data from the Esp32, convert x, y, and z data to byte array data type, and transfer that data to Unity using MQTT communication.
- The package also includes the Esp32 code that receives numerical data at the Esp32. You write this code to the Esp32 using Arduino IDE.
- The package includes the Unity 3D object ‘vase’ for displaying the x, y, and z and Inputfield / Dropdown / Button for sending numerical to the Esp32.
- The Esp32WiFiSampleCode describes receiving the x, y, and z data from Esp32 and sending the numerical data to Esp32.
- EspWiFi on the Windows PC works as Publisher and Subscriber, also Broker. EspWiFi on the Esp32 works as a Publisher and Subscriber.
- Refer to ‘EspWiFi Quick Start’ for how to set up the EspWiFi In detail.
- Refer to ‘EspWiFi Design Tips’ to rewrite the Esp32 code and the Esp32WiFiSampleCode.
Requirements:
- Unity 2022.3 or newer
- Windows PC (Windows 10 or 11) on Network including WiFi Router.
- Esp32 (not work Esp32 S3 or Esp32 C3)
- Arduino IDE, for details, refer to ‘Arduino IDE v2 for Esp32’ for how to set up the development environment.
WiFi for Pico – Raspberry Pi Pico W MQTT Interface
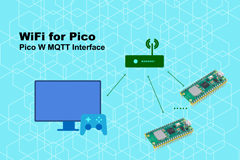
Asset ‘WiFi for Pico’ is an interface asset between a single Windows PC and plural Pico Ws via WiFi using MQTT communication. This asset can quickly add plural Pico Ws to your game as a gamepad ― no code required! To use the sensors device (gyro, accelerometer, GPS, etc.) and the display panel (LED, LCD panel, etc.) on the Pico W, you write code in purchased assets into the Pico W and create Unity scripts by referencing sample code in purchased assets. Thereby you can use the sensor device data and the display panel data in your game.
Features:
- This asset includes the Pico W code that obtains x, y, and z data from the Pico W. You write this code to the Pico W using Arduino IDE.
- Read x, y, and z data from the Pico W, convert x, y, and z data to byte array data type, and transfer that data to Unity using MQTT communication.
- This asset also includes the Pico W code that receives numerical data at the Pico W. You write this code to the Pico W using Arduino IDE.
- This asset includes the Unity 3D object ‘vase’ for displaying the x, y, and z and Inputfield / Dropdown / Button for sending numerical to the Pico W.
- The PicoWiFiSampleCode describes receiving the x, y, and z data from Pico W and sending the numerical data to Pico W.
- This asset on the Windows PC works as Publisher and Subscriber, also Broker. This asset on the Pico W works as a Publisher and Subscriber.
- Refer to ‘Quick Start of WiFi for Pico’ for details on how to set up this asset.
- Refer to ‘Design Tips of WiFi for Pico’ to rewrite the Pico W code and the PicoWiFiSampleCode.
Requirements:
- Unity 2022.3 or newer
- Windows PC (Windows 10 or 11) on Network including WiFi Router.
- Raspberry Pi Pico W (Rasberry Pi Pico does not work)
- Arduino IDE, for details, refer to ‘Arduino IDE v2 for Pico/Pico W’ for how to set up the development environment.
WiFi for Pi – Raspberry Pi MQTT Interface<
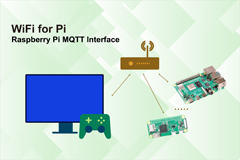
Asset ‘WiFi for Pi’ is an interface asset between a single Windows PC and plural Raspberry Pis via WiFi using MQTT communication. This asset can quickly add plural Raspberry Pis to your game as a gamepad ― no code required! To use the sensors device (gyro, accelerometer, GPS, etc.) and the display panel (LED, LCD panel, etc.) on the Raspberry Pi, you write code in purchased assets into the Raspberry Pi and create Unity scripts by referencing sample code in purchased assets. Thereby you can use the sensor device data and the display panel data in your game.
Features:
- This asset includes the Raspberry Pi code that obtains x, y, and z data from the Raspberry Pi. You write this code to the Raspberry Pi using Arduino IDE.
- Read x, y, and z data from the Raspberry Pi, convert x, y, and z data to byte array data type, and transfer that data to Unity using MQTT communication.
- This asset also includes the P Raspberry Pi code that receives numerical data at the Raspberry Pi. You write this code to the Raspberry Pi using Arduino IDE.
- This asset includes the Unity 3D object ‘vase’ for displaying the x, y, and z and Inputfield / Dropdown / Button for sending numerical to the Raspberry Pi.
- The PiWiFiSampleCode describes receiving the x, y, and z data from the Raspberry Pi and sending the numerical data to the Raspberry Pi.
- This asset on the Windows PC works as Publisher and Subscriber, also Broker. This asset on the Raspberry Pi works as a Publisher and Subscriber.
- Refer to ‘Quick Start of WiFi for Pi’ for details on how to set up this asset.
- Refer to ‘Design Tips of WiFi for Pi’ to rewrite the Raspberry Pi code and the PiWiFiSampleCode.
Requirements:
- Unity 2022.3 or newer
- Windows PC (Windows 10 or 11) on Network including WiFi Router.
- Raspberry Pi 4(including Raspberry Pi Zero W) or higher


