Android端末で動作するFragmentを使った画面遷移アプリを作成します。画面遷移はFragmentを使って表示された遷移ボタンを使用します。画面遷移時には、Fragmentを使って表示された画面が上下/左右にアニメーションにより遷移します。
ここでは遷移ボタンを作成します。
- Android Studio Bumblebee|2021.1.1
- 開発言語:Java
関連するブログを次に示します。
最終的に作成した画面遷移アプリを次に示します。なおプロジェクト名は「FragmentTest」とします。

Fragmentの新規作成
Android Studioを使って次の手順でFragmentを作成します。
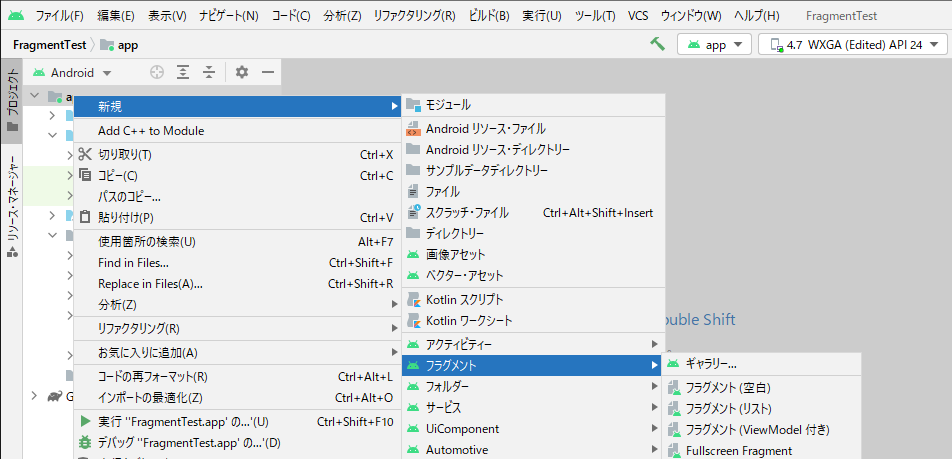
- 「ファイル」>「新規」>「フラグメント」>「ギャラリ」を選択します。
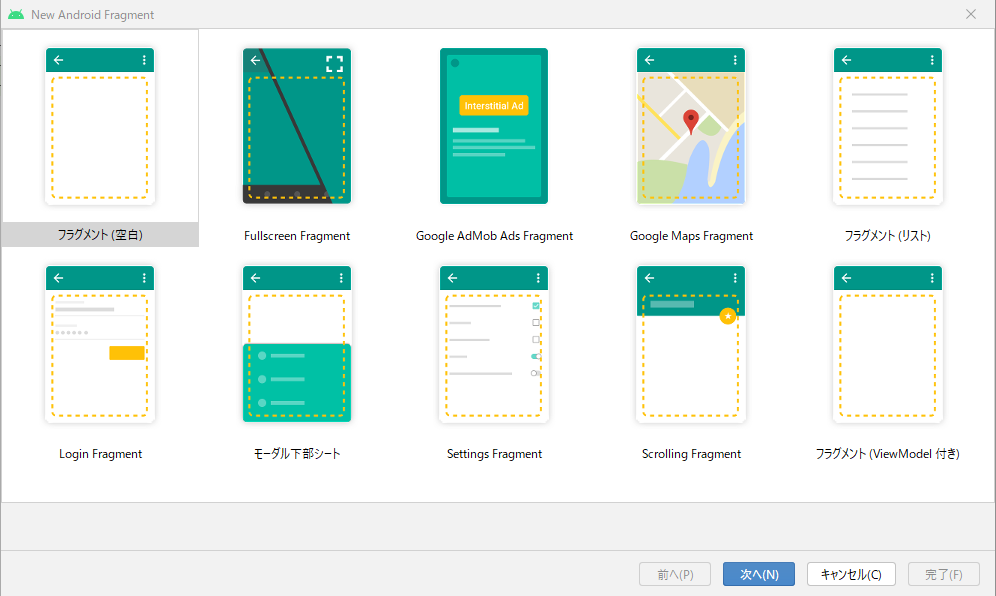
- 「フラグメント(空白)」を選択します。
- フラグメント名「SwFragment」、フラグメント・レイアウト名「fragment_sw」を設定します。

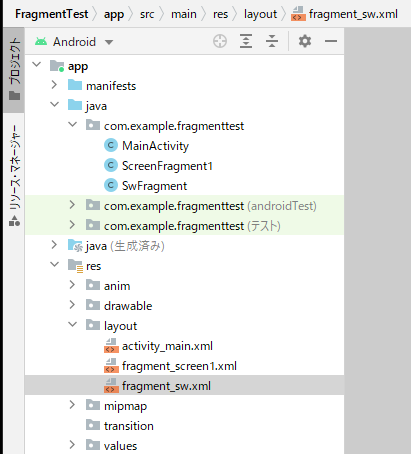
Fragmentを作成した結果、プロジェクトには次のように表示されます。画面遷移するためのフラグメント「ScreenFragment1」も含みます。
遷移ボタンの作成
画面の遷移方向を指示する上下/左右の遷移ボタンを次のように作成します。
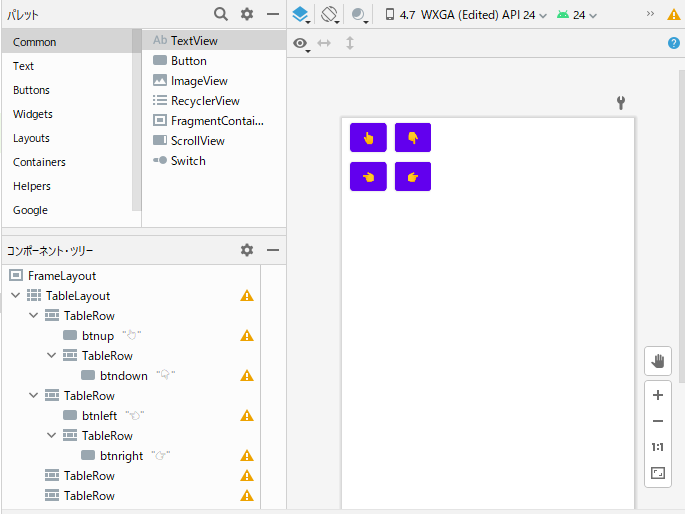
- コンポーネントツリーには「FrameLayout」がすでに設定されています。ここにボタンなどを配置すると、左上に重なって表示されます。このため、「TableLayout」を配置して次のように4個のボタンを配置します。
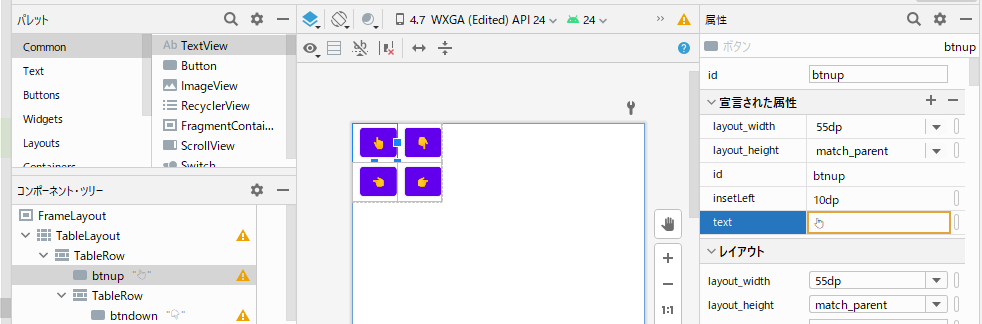
左上のボタンの属性を次に示します。「layout_width」を55dpにしてボタンの幅を少し小さくし、「insetLeft」を10pdにしてボタン間に隙間を設けます。
作成したlayoutコード「fragment_sw.xml」を次に示します。
fragment_sw.xml
<?xml version="1.0" encoding="utf-8"?>
<FrameLayout xmlns:android="http://schemas.android.com/apk/res/android"
    xmlns:tools="http://schemas.android.com/tools"
    android:layout_width="match_parent"
    android:layout_height="match_parent"
    tools:context=".SwFragment">

    <TableLayout
        android:layout_width="wrap_content"
        android:layout_height="wrap_content">

        <TableRow
            android:layout_width="match_parent"
            android:layout_height="match_parent">

            <Button
                android:id="@+id/btnup"
                android:layout_width="55dp"
                android:layout_height="match_parent"
                android:insetLeft="10dp"
                android:text="👆" />

            <TableRow
                android:layout_width="match_parent"
                android:layout_height="match_parent">

                <Button
                    android:id="@+id/btndown"
                    android:layout_width="55dp"
                    android:layout_height="wrap_content"
                    android:insetLeft="10dp"
                    android:text="👇" />

            </TableRow>
        </TableRow>

        <TableRow
            android:layout_width="match_parent"
            android:layout_height="match_parent">

            <Button
                android:id="@+id/btnleft"
                android:layout_width="55dp"
                android:layout_height="wrap_content"
                android:insetLeft="10dp"
                android:text="👈" />

            <TableRow
                android:layout_width="match_parent"
                android:layout_height="match_parent">

                <Button
                    android:id="@+id/btnright"
                    android:layout_width="55dp"
                    android:layout_height="wrap_content"
                    android:insetLeft="10dp"
                    android:text="👉" />
            </TableRow>
        </TableRow>

        <TableRow
            android:layout_width="match_parent"
            android:layout_height="match_parent" />

        <TableRow
            android:layout_width="match_parent"
            android:layout_height="match_parent" />
    </TableLayout>
</FrameLayout>
Fragmentでの遷移ボタンのイベント処理
作成したFragment「SwFragment.java」で遷移ボタンのイベントを次のように処理します。
- 1行目でボタンのリスナーのインタフェースを宣言します。
- 16-19行目で各ボタンをリスナーに登録します。
- ボタンがクリックされると、25行目の「onClick」に制御が移ります。
- ボタンのIDに従いそれぞれ処理を行います。mListener.onClickDirectionメソッドは親の「MainActivity」とのデータ受け渡しに使用します(後で説明します)。
SwFragment.java
public class SwFragment extends Fragment implements View.OnClickListener {

・・・

    @Override
    public View onCreateView(LayoutInflater inflater, ViewGroup container,
                             Bundle savedInstanceState) {
        // Inflate the layout for this fragment
        View view = (View) inflater.inflate(R.layout.fragment_sw, container, false);
        // ボタンの取得
        Button btnup = (Button) view.findViewById(R.id.btnup);
        Button btndown = (Button) view.findViewById(R.id.btndown);
        Button btnleft = (Button) view.findViewById(R.id.btnleft);
        Button btnright = (Button) view.findViewById(R.id.btnright);
        // リスナーの登録
        btnup.setOnClickListener((View.OnClickListener) this);
        btndown.setOnClickListener((View.OnClickListener) this);
        btnleft.setOnClickListener((View.OnClickListener) this);
        btnright.setOnClickListener((View.OnClickListener) this);

        return view;
    }

    @Override
    public void onClick(View v) {
        int btnId = v.getId();
        if (btnId == R.id.btnup) {
            System.out.println("UP!");
            mListener.onClickDirection(MainActivity.BTN_UP);
        } else if (btnId == R.id.btndown) {
            System.out.println("down!");
            mListener.onClickDirection(MainActivity.BTN_DOWN);
        } else if (btnId == R.id.btnleft) {
            System.out.println("left!");
            mListener.onClickDirection(MainActivity.BTN_LEFT);
        } else {
            System.out.println("right!");
            mListener.onClickDirection(MainActivity.BTN_RIGHT);
        }
    }

・・・
遷移ボタンの表示
次の手順に従って、Fragment上に作成した遷移ボタンをAndroid端末に表示します。
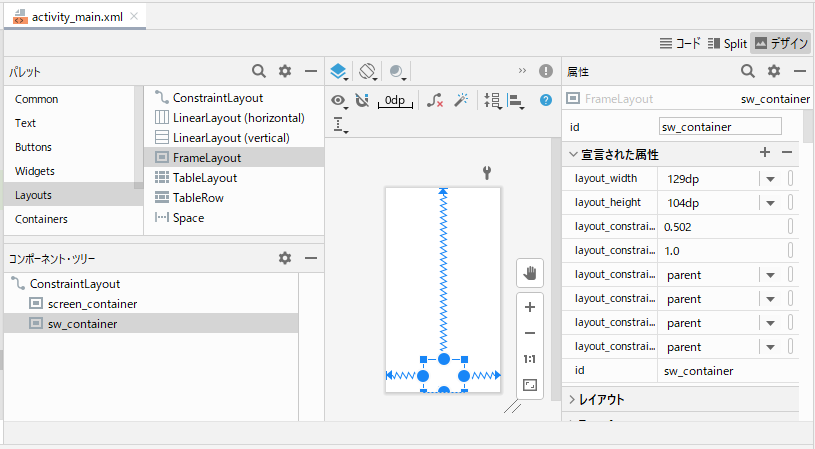
- 「activity_main.xml」を開き、パレットの「Layouts」から「FrameLayout」を選択して、コンポーネントツリーに次のようにドラッグします。この「FrameLayout」にFragment「fragment_sw.xml」上に作成した遷移ボタンの表示領域を指定します。
- 次の処理を追加して、Fragment「SwFragment.java」で作成した遷移ボタンを表示します。
FragmentTest/MainActivity.java
    @Override
    protected void onCreate(Bundle savedInstanceState) {
   ・・・
        SwFragment swfragment = new SwFragment();
        FragmentTransaction swtransaction = getSupportFragmentManager().beginTransaction();
        swtransaction.add(R.id.sw_container, swfragment);
        swtransaction.commit();

    }
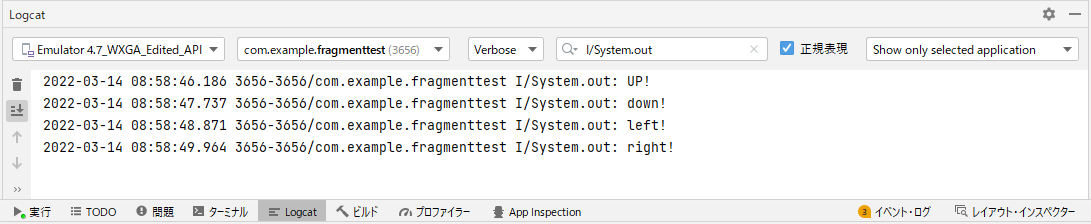
画面遷移アプリを実行して遷移ボタンをクリックすると、対応するボタン名が次のようにLogcatウインドウに表示されます。