「TensorFlow 2 による物体検出」で、アノテーション作成ツール「VoTT」を使用して、動画から教師データや検証用データとして使用するアノテーションデータを作成しました。今回は出力されたアノテーションデータについて、詳しく調べます。
【実行環境】
- tensorflow 2.6.0
- tensorflow-addons 0.14.0
- tensorflow-datasets 4.4.0
- tensorflow-estimator 2.6.0
- tensorflow-gpu 2.6.0
- tensorflow-hub 0.12.0
- tensorflow-metadata 1.2.0
- tensorflow-model-optimization 0.6.0
- tensorflow-text 2.6.0
TFRecordファイルの可視化
アノテーション作成ツール「VoTT」で、フォルダ「TensorTest-TFRecords-export」にエクスポートしたTFRecordファイルの構造について、次のスクリプト「TFRecordToImg.py」により可視化します。ファイル「signalmp4.tfrecord」は、アノテーション作成ツール「VoTT」でエクスポートしたTFRecordファイルです。詳細については「TFRecords と tf.Example の使用法」の「TFRecord ファイルの読み込み」を参照してください。
TFRecordToImg.py
import tensorflow as tf
import numpy as np
import IPython.display as display

loaded_ds_train = tf.data.TFRecordDataset("signalmp4.tfrecord")
print(loaded_ds_train)

for raw_record in loaded_ds_train.take(1):
#    print(repr(raw_record))
    example = tf.train.Example()
    example.ParseFromString(raw_record.numpy())
    print(example)
スクリプト「TFRecordToImg.py」を実行した結果を次に示します。
- 9行目の「image/encoded」で、 画像のバイナリデータが定義されます。
- 49行目の「image/object/bbox/xmax」,58行目の「image/object/bbox/xmin」,67行目の「image/object/bbox/ymax」,76行目の「image/object/bbox/ymin」で、 アノテーションした座標位置が定義されます。アノテーションした数だけ値が含みます。
- 85行目の「class/label で、タグ名に付与された番号「0」「1」が定義されます。
- 94行目の「class/text」で、タグの名前「signalA_red」「signalB_green」が定義されます。
2021-10-08 08:18:33.422875: I tensorflow/core/platform/cpu_feature_guard.cc:142] This TensorFlow binary is optimized with oneAPI Deep Neural Network Library (oneDNN) to use the following CPU instructions in performance-critical operations:  AVX AVX2
To enable them in other operations, rebuild TensorFlow with the appropriate compiler flags.
2021-10-08 08:18:34.861523: I tensorflow/core/common_runtime/gpu/gpu_device.cc:1510] Created device /job:localhost/replica:0/task:0/device:GPU:0 with 1335 MB memory:  -> device: 0, name: NVIDIA GeForce GT 1030, pci bus id: 0000:01:00.0, compute capability: 6.1
<TFRecordDatasetV2 shapes: (), types: tf.string>
2021-10-08 08:18:34.966740: I tensorflow/compiler/mlir/mlir_graph_optimization_pass.cc:185] None of the MLIR Optimization Passes are enabled (registered 2)
features {
  feature {
    key: "image/encoded"
    value {
      bytes_list {
        value: "\377\330\37 ・・・・・(シリアライズされた画像データ)
      }
    }
  }
  feature {
    key: "image/filename"
    value {
      bytes_list {
        value: "signal.mp4#t=0.2.jpg"
      }
    }
  }
  feature {
    key: "image/format"
    value {
      bytes_list {
        value: "jpg"
      }
    }
  }
  feature {
    key: "image/height"
    value {
      int64_list {
        value: 480
      }
    }
  }
  feature {
    key: "image/key/sha256"
    value {
      bytes_list {
        value: "TqXFCKZWbnYkBUP4/rBv1Fd3e+OVScQBZDav2mXSMw4="
      }
    }
  }
  feature {
    key: "image/object/bbox/xmax"
    value {
      float_list {
        value: 0.6279257535934448
        value: 0.4789402186870575
      }
    }
  }
  feature {
    key: "image/object/bbox/xmin"
    value {
      float_list {
        value: 0.48531702160835266
        value: 0.37633150815963745
      }
    }
  }
  feature {
    key: "image/object/bbox/ymax"
    value {
      float_list {
        value: 0.3261205554008484
        value: 0.645285964012146
      }
    }
  }
  feature {
    key: "image/object/bbox/ymin"
    value {
      float_list {
        value: 0.2047913372516632
        value: 0.515455961227417
      }
    }
  }
  feature {
    key: "image/object/class/label"
    value {
      int64_list {
        value: 0
        value: 1
      }
    }
  }
  feature {
    key: "image/object/class/text"
    value {
      bytes_list {
        value: "signalA_red"
        value: "signalB_green"
      }
    }
  }
  feature {
    key: "image/object/difficult"
    value {
      int64_list {
        value: 0
        value: 0
      }
    }
  }
  feature {
    key: "image/object/truncated"
    value {
      int64_list {
        value: 0
        value: 0
      }
    }
  }
  feature {
    key: "image/object/view"
    value {
      bytes_list {
        value: "Unspecified"
        value: "Unspecified"
      }
    }
  }
  feature {
    key: "image/source_id"
    value {
      bytes_list {
        value: "signal.mp4#t=0.2.jpg"
      }
    }
  }
  feature {
    key: "image/width"
    value {
      int64_list {
        value: 640
      }
    }
  }
}

Process finished with exit code 0
アノテーション画像の取得
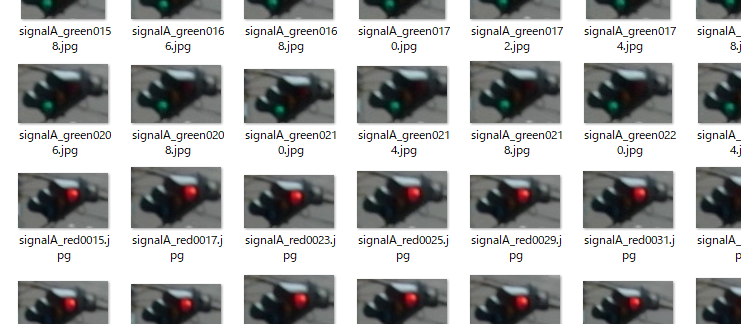
アノテーション作成ツール「VoTT」で、フォルダ「Target」に出力されたjsonファイルを用いて、入力した動画ファイルから作成したアノテーション画像を、次のスクリプト「cutimg.py」により取得します。
cutimg.py
import json
import os
import fnmatch
import cv2

JSON_DIR = 'vott-json/'
IMG_DIR = 'vott-json/'
CUT_IMAGE = 'cut_images/'
IMAGE_FORMAT = '.jpg'


class Check():

    def filepath_checker(self, dir):

        if not (os.path.exists(dir)):
            print('No such directory > ' + dir)
            exit()

    def directory_init(self, dir):

        if not (os.path.exists(dir)):
            os.makedirs(dir, exist_ok=True)


def save_frame_sec(video_path, sec, result_path):
    cap = cv2.VideoCapture(video_path)

    if not cap.isOpened():
        return

    os.makedirs(os.path.dirname(result_path), exist_ok=True)

    fps = cap.get(cv2.CAP_PROP_FPS)

    cap.set(cv2.CAP_PROP_POS_FRAMES, round(fps * sec))

    ret, frame = cap.read()

    if ret:
        cv2.imwrite(result_path, frame)
        return frame


def main():
    check = Check()

    # jsonファイルを格納したディレクトリが存在するかチェック
    check.filepath_checker(JSON_DIR)

    # 'CUTした画像の格納場所を準備'
    check.directory_init(CUT_IMAGE)

    # jsonを解析し、画像とアノテーション座標から切り出しをしていく
    count = 0
    for jsonName in fnmatch.filter(os.listdir(JSON_DIR), '*.json'):

        # jsonを開く
        with open(JSON_DIR + jsonName) as f:
            result = json.load(f)

            # 画像のファイル名の取得
            imgName = result['asset']['name']
            print('jsonName = {}, imgName = {} '.format(jsonName, imgName))

            # img = cv2.imread(IMG_DIR + imgName)

            if  'timestamp' not in result['asset'] :
                print('<timestamp is NULL>  imgName = ', imgName)
                continue

            img = save_frame_sec(IMG_DIR + 'signal.mp4', result['asset']['timestamp'], 'temp/result_10sec.jpg')

            if img is None:
                print('cv.imread Error')
                exit()

            # アノテーションした数だけループ
            for region in result['regions']:

                height = int(region['boundingBox']['height'])
                width = int(region['boundingBox']['width'])
                left = int(region['boundingBox']['left'])
                top = int(region['boundingBox']['top'])

                cutImage = img[top: top + height, left: left + width]
                # アノテーション中に誤って1点クリックしてしまった情報は避ける
                if height == 0 or width == 0:
                    print('<height or width is 0>  imgName = ', imgName)
                    continue

                # 書き出す前にリサイズする場合はコメントアウトを外しましょう
                # cutImage = cv.resize(cutImage, (300,300))

                # 「cut_images/cat0000.jpg」と連番でファイルを書き出す
                filename =region['tags'][0]
                cv2.imwrite(CUT_IMAGE + filename + "{0:04d}".format(count + 1) + IMAGE_FORMAT, cutImage)
                print("{0:04d}".format(count + 1))
                count += 1


if __name__ == "__main__":
    main()
スクリプト「cutimg.py」を実行した結果を次に示します。
jsonName = 001475cdcbe31e6b07da7f7b59f53cdc-asset.json, imgName = signal.mp4#t=8.933333
0001
0002
jsonName = 01c6357f4521d5ce878d8c95d02b3474-asset.json, imgName = signal.mp4#t=4.133333
0003
0004
jsonName = 01e94c050e6819a2962903bbedd2d5e8-asset.json, imgName = signal.mp4#t=27.8

・・・

0229
jsonName = fce141e62a7ccfbdcab982e3b24fe07a-asset.json, imgName = signal.mp4#t=32.866667
0230
0231
jsonName = fd4633d1b9b6441bce9d327cf3f1a034-asset.json, imgName = signal.mp4#t=14.133333
0232

Process finished with exit code 0
取得したアノテーション画像を次に示します。アノテーション作成ツール「VoTT」でアノテーション範囲を指定した画像が表示されます。

