「Qt DesignerによるPyQt5のGUIプログラム作成」でQt Designerで作成したGUIをRaspberry Pi 3上で実行させましたが、今回はパソコン上でPython 統合開発環境「Pycharm」を使用して、Qt Designerで作成したGUIを実行させます。各ソフトのバージョンを次に示します。
- Windows 7 Professional
- Pycharm Community Edition 2016.3.3
- python3:バージョン3.6.1
- Qt Designer:バージョン5.7.1
- PyQt5:バージョン5.10.1
Python統合開発環境「Pycharm」のインストール
Python 統合開発環境「Pycharm」は、パソコンのインストールファイルを「Pycharm」からダウンロードしてインストールします。「PycharmCOmmunity Edition 2016.3.3」がインストールされ、Pythonのバージョンは3.6.1になっていました。Python関連のファイルはフォルダ以下に作成されていました。
- python.exe: C:\Users\xx\AppData\Local\Programs\Python\Python36-32
- pip3.exe: C:\Users\xx\AppData\Local\Programs\Python\Python36-32\Scripts
Raspberry Pi 3へのPyQt5のインストール
次の手順に従い、Raspberry Pi 3上にPyQt5をインストールします。
- sipのインストール
- PyQt5のインストール
sipのインストール
次のコマンドでsipをインストールします。
C:\Users\xx\AppData\Local\Programs\Python\Python36-32\Scripts>pip3 install SIP
Collecting SIP
  Downloading sip-4.19.8-cp36-none-win32.whl (42kB)
    100% |????????????????????????????????| 51kB 295kB/s
Installing collected packages: SIP
Successfully installed SIP-4.19.8
PyQt5のインストール
次のコマンドでPyQt5のインストールをインストールします。
C:\Users\xx\AppData\Local\Programs\Python\Python36-32\Scripts>pip3 install PyQt5
Collecting PyQt5
  Downloading PyQt5-5.10.1-5.10.1-cp35.cp36.cp37.cp38-none-win32.whl (68.6MB)
    100% |????????????????????????????????| 68.6MB 11kB/s
Requirement already satisfied: sip<4.20,>=4.19.4 in c:\users\xx\appdata\local\pr
ograms\python\python36-32\lib\site-packages (from PyQt5)
Installing collected packages: PyQt5
Successfully installed PyQt5-5.10.1
変換ツール「pyuic5」もPyQt5のインストール時に作成されます。
「C:\Users\xxxx\AppData\Local\Programs\Python\Python36-32\Lib\site-packages」にPyQt5が作られました。
Qt Designerで作成したGUIをPython統合開発環境「Pycharm」で表示
「Qt DesignerによるPyQt5のGUIプログラム作成」の「Qt Designerで作成したGUIをPyQt5で表示」で使用したGUIとそれを呼び出すPythonスクリプトは同じものを使用します。
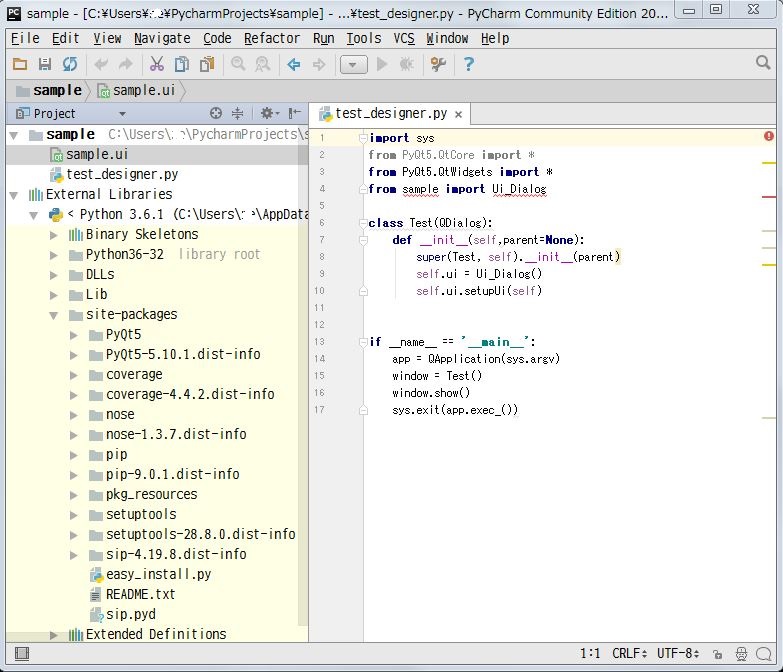
Python統合開発環境「Pycharm」でプロジェクト「sample」を作成し、Qt Designerで作成した「sample.ui」とそれを呼び出すスクリプト「test_designer.py」をプロジェクトに含めます。次のように表示画面が表示されます。
Project画面の「External Libraries」にPython関連のライブラリが表示されます。「site-packages」以下には、今回インストールされたPyQt5も登録されています。
Qt Designerで作成した「sample.ui」をPythonスクリプトに変換するために、「pyuic5」を使用します。
C:\Users\xxxx\PycharmProjects\sample>C:\Users\xxxx\AppData\Local\Programs\Python\Python36-32\Scripts/pyuic5 -o sample.py sample.ui
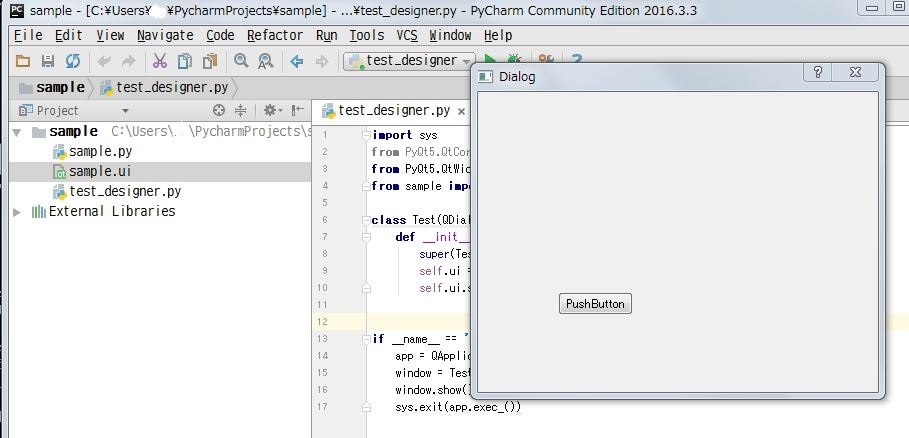
Python統合開発環境「Pycharm」で作成したPythonスクリプト「test_designer.py」を、メニュー「Run」「Run…」「test_designer」を選択して実行します。
Qt Designerで作成した画面が次のように表示されます。


