M5Stack Core2 for AWSでMH-Z19Cを使ってCO2の検出します。「M5Stack Core2 for AWSでMH-Z19Cを使ってCO2の検出」では、PlatformIOでスケッチを作成しましたが、今回はArduino IDEで作成します。
M5Stack Core2 for AWSとMH-Z19Cとの接続
Uart-EchoアプリやMH-Z19Cアプリともに、「M5Stack Core2 for AWSでMH-Z19Cを使ってCO2の検出」を参照します。
Uart-Echoアプリの作成
Uart-Echoアプリにより出力したシリアルデータをエコーバックし、シリアルポートを確認します。実行すると、シリアルモニタに「command= ON」が表示されます。
void setup() {
  // シリアル初期化
  Serial.begin(9600);
  while (!Serial)
    ;

  // シリアル初期化
  Serial2.begin(9600);
  while (!Serial2)
    ;
}

void loop() {
  String command;

  Serial2.println("ON");
  delay(1000);
  if (Serial2.available() > 0) {
    // 改行までをコマンドとして受付
    command = Serial2.readStringUntil('\n');
    // コマンド文字列をトリム
    command.trim();
    Serial.println("command=" + command);

    delay(100);
  }
}
MH-Z19Cアプリの作成
次の手順で、MH-Z19Cアプリの作成を作成します。
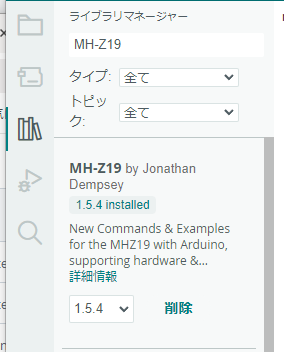
- ライブラリマネージャからライブラリ「MH-A19 by Jonathan」をインストールします。
- 次のようにスケッチ例からサンプルスケッチ「BasicUsage」を取得します。
- 取得したサンプルスケッチ「BasicUsage」を参照して、次のスケッチ「m5core2Mhz19c」を作成します。
- 19行目で、M5Stack Core2 for AWSのGrove端末の電源をONにします。電源が入ると、MH-Z19Cの表面がピンク色になり、少し時間がたつとその表示が点滅します。

m5core2Mhz19c
#include <M5Core2.h>
#include "MHZ19.h"

#define RX_PIN 13      // Rx pin which the MHZ19 Tx pin is attached to
#define TX_PIN 14      // Tx pin which the MHZ19 Rx pin is attached to
#define BAUDRATE 9600  // Device to MH-Z19 Serial baudrate (should not be changed)

MHZ19 myMHZ19;  // Constructor for library
#if defined(ESP32)
HardwareSerial mySerial(2);  // On ESP32 we do not require the SoftwareSerial library, since we have 2 USARTS available
#else
#include <SoftwareSerial.h>  //  Remove if using HardwareSerial or non-uno compatible device
SoftwareSerial mySerial(RX_PIN, TX_PIN);  // (Uno example) create device to MH-Z19 serial
#endif

unsigned long getDataTimer = 0;

void setup() {
  M5.begin();

  mySerial.begin(BAUDRATE);  // (Uno example) device to MH-Z19 serial start
  myMHZ19.begin(mySerial);                                // *Serial(Stream) reference must be passed to library begin().
  myMHZ19.autoCalibration();  // Turn auto calibration ON (OFF autoCalibration(false))
}

void loop() {
  if (millis() - getDataTimer >= 2000) {
    int CO2;

    /* note: getCO2() default is command "CO2 Unlimited". This returns the correct CO2 reading even
        if below background CO2 levels or above range (useful to validate sensor). You can use the
        usual documented command with getCO2(false) */

    CO2 = myMHZ19.getCO2();  // Request CO2 (as ppm)
    Serial.print("CO2 (ppm): ");
    Serial.println(CO2);

    int8_t Temp;
    Temp = myMHZ19.getTemperature();  // Request Temperature (as Celsius)
    Serial.print("Temperature (C): ");
    Serial.println(Temp);

    getDataTimer = millis();
  }
}
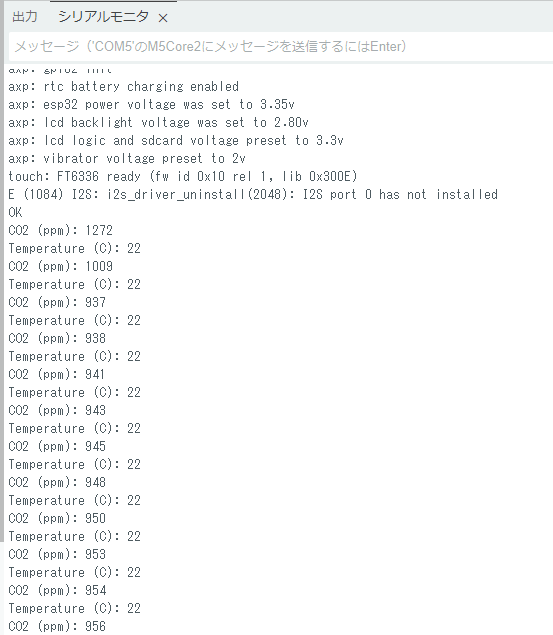
MH-Z19Cアプリの実行
MH-Z19Cアプリ「m5core2Mhz19c」を実行します。シリアルモニタに次のメッセージが表示されます。