RapberryPi Zero Wで2.4 inch Full Color LCDにロゴを表示させます。
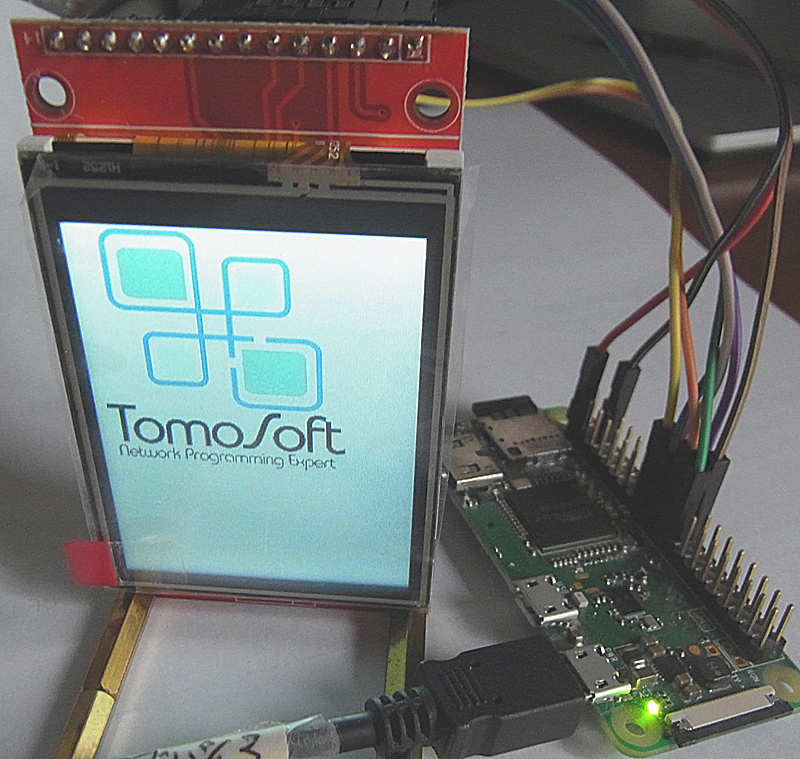
Raspberry PI 3と2.4 inch Full Color LCDの接続
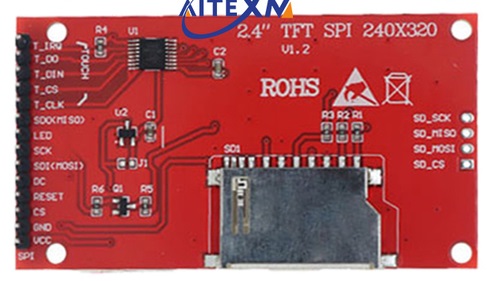
2.4 inch Full Color LCDは、SPIインタフェースを持ち、コントローラ「ST7789V」を使って描画します。AliExpressの「SZ Aitexm Store」で購入しました。
製品仕様
- 2.4-inch color screen,support 65K color display,display rich colors
- 320X240 resolution, touch function
- Using the SPI serial bus, it only takes a few IOs to illuminate the display
- Easy to expand the experiment with SD card slot
| Name | Parameter |
|---|---|
| Display Color | RGB 65K color |
| SKU | MSP2402 |
| Screen Size | 2.4(inch) |
| Type | TFT |
| Driver IC | ST7789V |
| Resolution | 320*240 (Pixel) |
| Module Interface | 4-wire SPI interface |
| Active Area (AA area) | 36.72×48.96(mm) |
| Module PCB Size | 77.18×42.72(mm) |
| Operating Temperature | -20℃~60℃ |
| Storage Temperature | -30℃~70℃ |
| VCC power voltage | 3.3V~5V |
| Logic IO port voltage | 3.3V(TTL) |
| Rough Weight(Package containing) | With touch: 36(g) |
RapberryPi Zero Wと2.4 inch Full Color LCDを次のように接続します。
| RapberryPi Zero | LCD |
|---|---|
| 3.3V Power | LED |
| GPIO 11 (SCLK) | SCK |
| GPIO 9 (MISO) | SDO(MISO) |
| GPIO 10 (MOSI) | SDI(MOSI) |
| GPIO 8 (CE0) | CS |
| GPIO 24 | RESET |
| GPIO 25 | DC |
| 3.3V Power | VCC |
| Ground | GND |
LCDの裏面を次に示します。SDカードスロットがついています。写真右側の4つのスルーホールにピンヘッダをはんだ付けすると、SDカードにアクセスできます。左側の上5本のT_***というピンはタッチパネル制御のためのピンです。
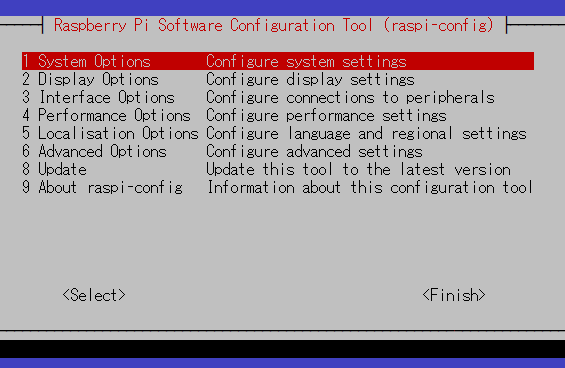
SPIの有効化
次のコマンドによりRaspberry Pi OSのSPIを有効化します。
$ sudo raspi-config
次の設定画面から、”3 Interfacing Options” → “I4 SPI” → “Select” と選択し、SPIを有効化します。
Pythonライブラリのインストール
AdafruitのPythonライブラリを次のコマンドでインストールします。このライブラリは、ILI9341などのコントローラにも対応しています。
$ sudo apt-get install python3-rpi.gpio python3-spidev python3-pip python3-pil python3-numpy
$ pip3 install adafruit-circuitpython-rgb-display
ロゴ表示プログラムの作成
次に作成したロゴ表示プログラ「lcdtestaAdafruit.py」を示します。
- 28行目で画面クリアのため白で画面を塗りつぶします。このLCDは白黒反転しています。
- 34行目でロゴのjpgファイルを読み込み、37行目で描画しています。
lcdtestaAdafruit.py
from adafruit_rgb_display.rgb import color565
#from adafruit_rgb_display.ili9341 import ILI9341
from adafruit_rgb_display.st7789 import ST7789

from busio import SPI
from digitalio import DigitalInOut
import board

from PIL import Image, ImageDraw, ImageOps

# Pin Configuration
cs_pin = DigitalInOut(board.D8)
dc_pin = DigitalInOut(board.D25)
rst_pin = DigitalInOut(board.D24)

# Set up SPI bus
spi = SPI(clock=board.SCK, MOSI=board.MOSI, MISO=board.MISO)

# Create the ST7789 display:
display = ST7789(
    spi,
    cs=cs_pin, dc=dc_pin, rst=rst_pin,
    width=240, height=320,
    rotation=0,
    baudrate=24000000
)
# Define color
imgClear = color565((0, 0, 0))

# Fill display with one color
display.fill(imgClear)

# Open image
image = Image.open("logo.jpg")

# Display image
display.image(ImageOps.invert(image))
ロゴ表示プログラムの実行
次のコマンドで作成したロゴ表示プログラム「lcdtestaAdafruit.py」を実行します。
$ python3 lcdtestaAdafruit.py
2.4 inch Full Color LCDに次のようにロゴが表示されます。