Unityで画像などのアセットデータをAddressable Assets Systemで管理します。
【 環境 】
・Unity:2020.3.12f
・Addressable :1.19.15
Addressableパッケージのインストール
Addressable Assets Systemを使うには、「Addressables」パッケージをインストールする必要があります。
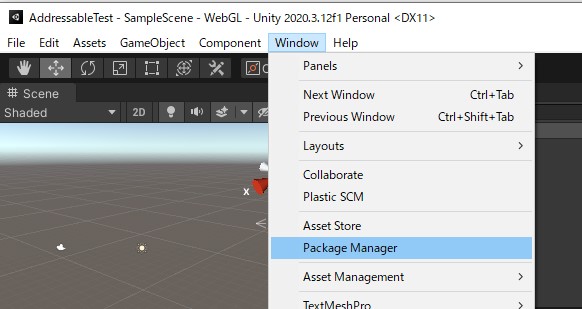
project「AddressablesTest」を作成し、「Window」→「Package Manager」をクリックし、パッケージマネージャを開きます。
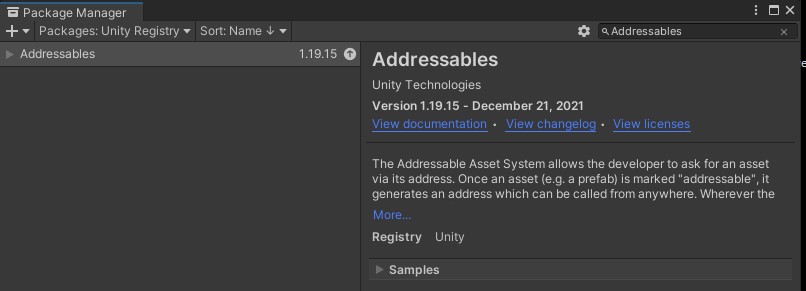
「Addressables」で検索し、見つかると「Install」ボタンをクリックします。
アセット(画像)の読み込み
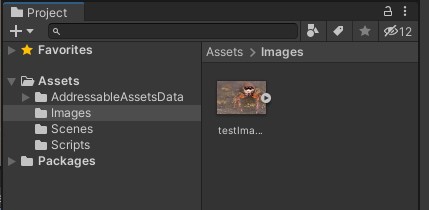
フォルダを作成し、画像をUnityに読み込みます。
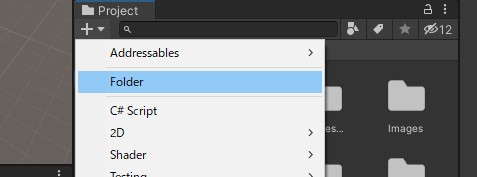
次のように「+」をクリックし、「Folder」を選びます。フォルダ「Images」を作成します。
作成した「Images」フォルダを開き、画像「testImage.jpg」をドラッグ&ドロップします。
Addressableを使うための設定
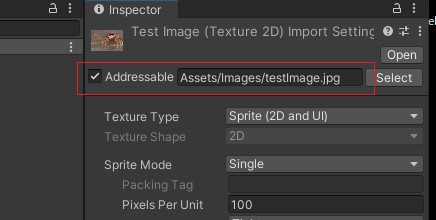
画像をAddressable Assets Systemで扱うために画像「testImage.jpg」を選択し、「Inspector」タブに表示された「Addressable」に次のようにチェックを入れます。するとその画像までのパスが表示されます。
画像を表示するPanelの作成
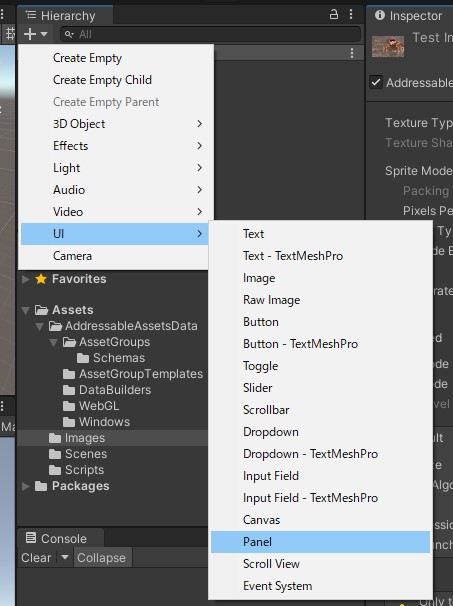
画像を表示するPanelを作成します。
次のように「Hierarchy」タブの「+」をクリックし、「UI」→「Panel」を選択します。作った「Panel」は名前「EventCG」とします。
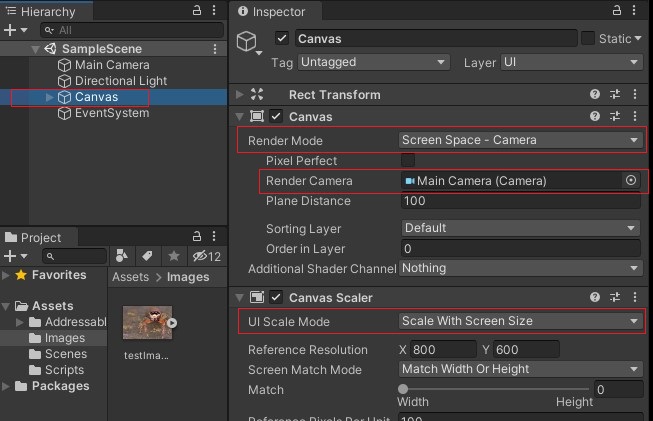
Canvasを選択し、「Inspector」タブに表示された「Render Mode」を「Screen Space – Camera」、「Render Camera」を「Main camera(Camera)」、「UI Scale Mode」を「Scale With Screen Size」に変更します。
画像を読み込みスクリプト作成
スクリプトを使って画像を読み込みます。
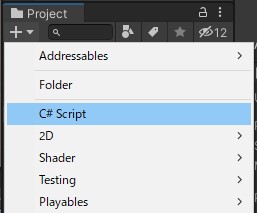
- 「Project」タブの「+」をクリックし、「Folder」を選び、フォルダ「Scripts」を作成します。
- フォルダ「Scripts」をダブルクリックして開き、「+」をクリックして、「C# Script」を選択します。ファイル名は「EventCGManager」とします。
- 作成したスクリプト「EventCGManager」を、「Hierarchy」タブの「EventCG」にドラッグ&ドロップします。
- EventCGManagerをダブルクリックしてエディタを開き、コードを以下のようにします。
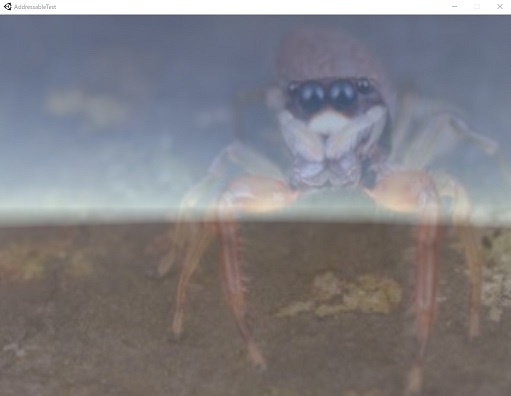
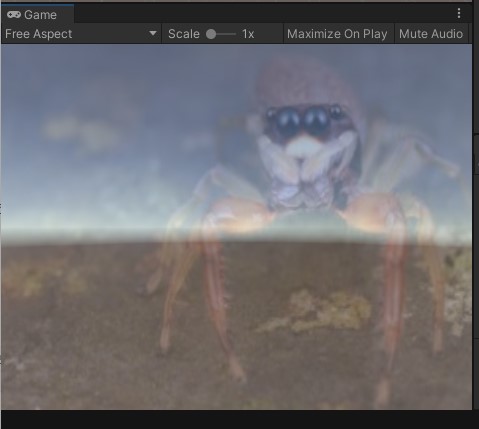
- 再生ボタンをクリックすると、Unity上の画面に次の画像を表示されます。
EventCGManager.cs
using UnityEngine;
using UnityEngine.UI;
using UnityEngine.AddressableAssets;


public class EventCGManager : MonoBehaviour
{
    Image _eventCG;

    // Start is called before the first frame update
    void Start()
    {
        Addressables.LoadAssetAsync<Sprite>("Assets/Images/testImage.jpg").Completed += sprite =>
        {
            _eventCG = GetComponent<Image>();
            _eventCG.sprite = Instantiate(sprite.Result);
        };
    }

    // Update is called once per frame
    void Update()
    {

    }
}
PC, Mac & Linux Standaloneへの画像表示
「PC, Mac & Linux Standalone」で表示するためには、アプリをビルドする前に、コンテンツを手動でビルドします。
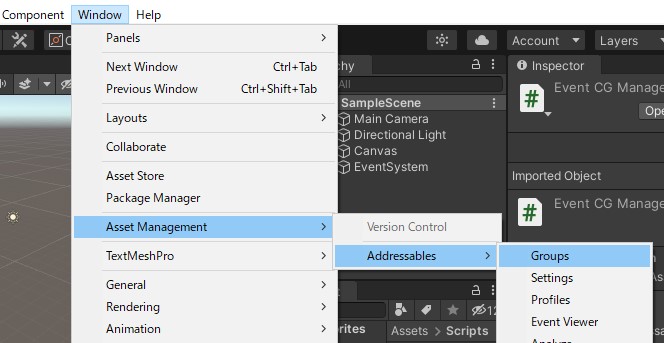
次のように「Window」→「Asset Management」→「Addressables」→「Groups」を開きます。
「Build」→「New Build」→「Default Build Script」をクリックします。

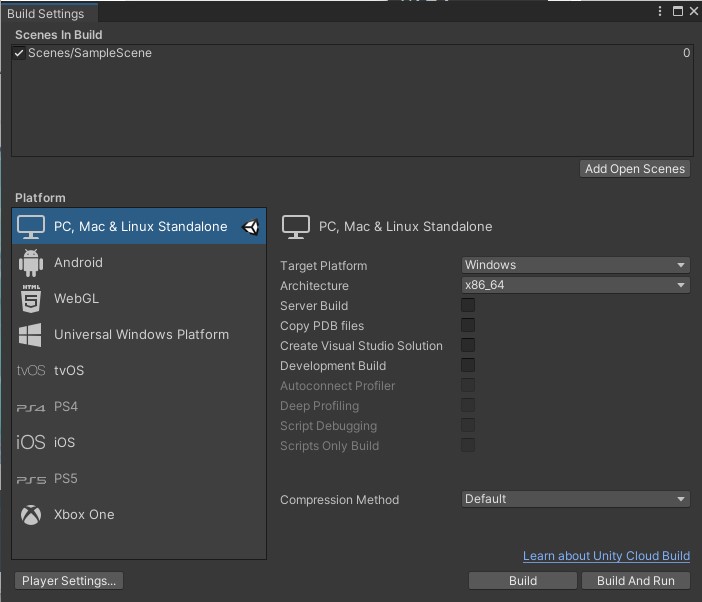
メニュー「File」を選択して「Build Settings」をクリックすると次の画面が表示されるので、「PC, Mac & Linux Standalone」を選択して、「Build And Run」をクリックします。
次のように画像がPC画面に表示されます。